Monday, February 21, 2011

:) Make a Pattern from Great Fitting Pants: Make Copies of Your Favorite Slacks

It always happens! A pair of pants fits perfectly, and no other pair measures up. The pants are then worn over and over until they start to wear out. It's almost impossible to find a pair that fits as well, so you're forced to settle with the next best pair.

There is another option. No one has to settle for uncomfortable pants, because the old, worn-out pair can be used as a pattern to make another perfect-fitting pair of pants. This is similar to making a knock-off, because the new pants will be copies that retain the basic design of the old pants.


  • Sharp scissors
  • Tailor's chalk
  • Straight pins
  • Pattern paper
  • Ruler or French Curve
  • Pen

How Do You Make the Pattern?


  1. Cut directly beside the side seams, inner leg seams, and the crotch seam. These pieces of fabric form the basic shape of your pattern. This saves a lot of guesswork when making the new pants, because the pockets and additions, like belt loops, are already perfectly positioned. Notes can be added with the tailor's chalk as needed.
  2. Pin the fabric pieces to the pattern paper. This needs to be done because the seam allowances have not been added yet.
  3. Measure 5/8 inch all of the way around each piece of fabric, and make several small marks.
  4. Fill in the lines between the marks by lining up the ruler, and draw the lines with the pen.
  5. Remove the pins from the fabric, and mark the corners of pockets on the pattern paper.


This creates a pattern that is an almost exact duplicate of the great-fitting pants.


 What Do You Need to Make a Pattern from an Old Pair of Pants?

:) Mending Clothes With Iron-On Patches: Easy Shortcut to Make Clothing Last Longer


Iron-on patches are not always the perfect solution, but they do provide an easy no-sew way to mend a hole.

Where to Find Iron-On Patches

Iron-on patches are available in sewing supply shops, in most department stores, and in some drug stores. These handy repair shortcut items are available in colors that closely match almost any color fabric. Various sizes are also easy to find, so both large and small holes can be easily repaired.

Disadvantages of Iron-On Patches

The main drawback of iron-on patches is the fact that they are not made of stretchy fabric. If you happen to rip a pair of sweatpants, or any knitted garment, the patches will not hold. The patches will, however, keep the hole from expanding until a more suitable patch can be applied.
The patches also occasionally do not stay attached to firm fabric, but that is usually a result of not using enough heat to bond the adhesive backing to the fabric.

Basic Tips for Using Iron-On Patches

The patches can be sewn on either the right or wrong side of the fabric depending on personal preference. If the color is matched well then the patch will barely show when attached to the outside. If there is a color variation it will be ideal to turn the garment inside out and attach the patch to the wrong side of the fabric.

How to Apply an Iron-On Patch


  1. Clean any dirt or debris off of the fabric around the tear with a soft-bristled brush. The patch needs a clean surface or it will not adhere properly and washing will fray the fabric.
  2. Set the iron on the hottest setting the fabric can stand. The patch will require a hot iron to melt the backing and create a secure bond.
  3. Center the patch over the hole, either on the right or wrong side of the fabric according to personal preference.
  4. Place a damp cloth over the patch to protect the fabric and hold the iron over the area where the patch has been placed for 60 seconds.
  5. Let the patch cool completely before checking to see if it bonded with the fabric.
  6. If the bond is not secure turn the iron to a higher setting and repeat step 4.

:) Where to Find a Threading Guide or Manual for an Old Kenmore Sewing Machine

Kenmore sewing machines normally make strong, even stitches when properly threaded. However, an improperly threaded Kenmore sewing machine will skip stitches, break the thread, and might not sew at all. It's not always easy to find a threading guide for a vintage sewing machine, but it is often possible. 


Sewing Machine Manual
Where to Find a Vintage Sewing Machine Manual image courtesy of Pixabay


Tips for Finding Vintage Sewing Machine Manuals

Start by searching for your sewing machine make and model with the term threading guide or owners manual attached to the make and model.

For example, "Kenmore 117 threading guide." 


Some Places To Look for Old Sewing Machine Manuals


In addition to running a general search on the internet to find a threading guide for a vintage machine, you can try to request or order one from the manufacturer's website, if the company is still in business.

Many sites sell owners manuals online for around ten dollars, and at least one, Sew USA, has the threading guide portion of the information and full manuals, for many models and brands.

You can put a request in a sewing group, somewhere like the Stitching it Right Facebook group on the chance someone in the group has the same type of machine and is willing to share a photo image of the page or pages you need or perhaps even sell one.

Auction sites like eBay and online selling venues like Etsy also sometimes end up with vintage sewing machine manuals listed for sale, so those are palces you may also want to check if you can't find a threading guide or owner's manual anywhere else.

Updated August 15, 2018

By: Laure Justice


Thank you for visiting Stitching it Right. Questions and comments are always welcome here, on our Facebook page, in the group mentioned above, and on the YouTube channel. By the way, if you're interested in learning how to sew, please consider liking and subscribing to the Sewing Lessons From Stitching it Right video channel.


How to Start an Upholstery Shop eBook

If you try a couple of easy projects and think maybe you would enjoy owning your own upholstery shop, you might want to check out the ebook at the Amazon link below, How to Start an Upholstery Shop (Insider Tips for Upholsterers.) The book offers guidance on getting the best training, the tools you will need, writing a business plan to get started, where to find a building, finding a good supplier, and how-to's for three easy projects to get you started making money fast.


If you get the ebook, and find you have any questions as you read it, feel free to pop back in here and leave a comment; we'll get back to you as quickly as possible with the answers you need.

:) How to Use Baking Soda as Dye Fixer instead of Washing Soda

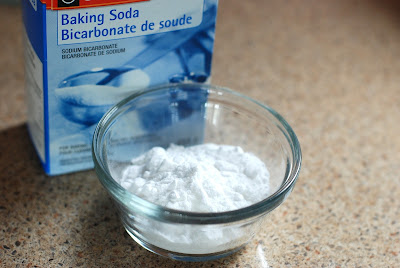
Baking soda can be used as a fixer for some dyes, but it requires a higher temperature to fix the dye than that required by soda ash fixer. 


Baking Soda Dye Fixer
Baking Soda Dye Fixer image courtesy of Pixabay


When Baking Soda Can Work as Dye Fixer


Some fabrics cannot stand up to the higher temperature needed, so check your fabric's care labels before using baking soda as a fixer solution instead of soda ash. Fabrics made of at least 60 percent natural fiber, like cotton, will take dye best, but make sure your fabric has been shrunk before using high heat so you can use baking soda as a fixer.

Items Needed to Use Baking Soda as Dye Fixer

  • Large stockpot, big enough to hold the fabric and cover it with water
  • Measuring cup
  • Baking soda
  • Cooking thermometer
  • Non-acidic dye
  • Wooden spoon
  • Rubber gloves

The Steps to Follow to Use Baking Soda as Dye Fixer

  1. Place the fabric in the stock pot, and add 1/2 cup baking soda. Add hot water and mix the fabric and baking soda to dissolve the baking soda. Add more baking soda if needed to make a fixing solution of 1/2 cup baking soda per gallon of water. Let the fabric soak in the baking soda and water for one hour.
  2. Add another 1/2 cup of baking soda, and turn the stove on to the low heat setting. Add more water if too much steams out and the fabric becomes uncovered. Check the temperature with the cooking thermometer. When the baking soda water reaches 122 degrees Fahrenheit, add the non-acidic dye.
  3. Work the dye into the water, and through the fabric by pushing and stirring the fabric with the wooden spoon. Allow the dye to stay on the fabric according to the dye package's directions. The longer the fabric remains in the dye, the deeper the color you can expect to get.
  4. Drain off the dye, put on the rubber gloves, and wring out the dyed fabric. Rinse the fabric with cold water and then hang it up to line dry.

Note about using baking soda to set dye

Baking soda changes to soda ash at 122 degrees Fahrenheit.

By: Laure Justice
Article updated 8/15/2018

Resources:
  • Global Mama: How to Tie Dye 
  • P. Burch: How Soda Ash is Used in Dyeing: Alternatives
  • P. Burch: Can Baking Soda Be Used As a Fixative in Dyeing?


Thank you for visiting Stitching it Right. Comments are welcome here, on our Facebook page, or under any of the posts on our YouTube channel. Oh, and while you're checking out our videos, if you are interested in learning to sew or just picking up some tips on different techniques, please subscribe to our Sewing Lessons from Stitching it Right YouTube channel.

:) Food Coloring Monochromatic Tie-Dye for T-Shirts

You can make tie dye t-shirts with food coloring for the dye, but the natural food colors might fade faster than the colors from manufactured dyes. Synthetic fibers and cotton will not usually take food coloring as a dye, but nylon is the exception. 


Tie Dye for T-Shirts
Tie Dye for T-Shirts image courtesy of Pixabay


Using Food Coloring to Dye Clothes

This is not a project for young children, because it takes a fair amount of heat to set the food-coloring in the fabric. Also, this will work best if you stick to a single color, rather than blending colors.

The Items Needed to Use Food Coloring for Tie-Dyeing a T-shirt

* 1 Nylon T-shirt
* 1 stock-pot
* 1 teaspoon food coloring
* Nylon craft string or an old satin ribbon
* Water
* Wooden spoon
* Scissors (optional)

The Steps to Follow to Food-Color Tie-Dye a T-Shirt

1.  Fill the stock-pot halfway full with water
2.  Place the stock-pot on the stove burner on low heat.
3.  Fold the t-shirt in the center, through both layers of fabric, and tie the string around the folded part.
4.  Twist and wrap the t-shirt fabric back around the first piece of string.
5.  Tie the twisted fabric securely around the first folded area.
6.  Fold or twist any other parts of the shirt as desired. Have fun with it, every one comes out different anyway.
7.  Add the food coloring to the steaming hot water.
8.  Place the shirt gently in the hot water, being careful not to burn yourself.
9.  Steam the shirt in the pot for about five minutes, holding it under with a wooden spoon, if it starts to float, to soak up the color.
10. Add 1 cup washing soda or borax and let simmer another three to five minutes.
11. Drain the colored water off of the shirt, and let it cool completely before you untie or cut the string.
12. Air dry the t-shirt, and then steam iron to remove wrinkles and to help set the color.
Wash the tie-dyed t-shirt alone in cold water using gentle detergent the first time after you finish the design. The food colors can somtimes bleed onto other items in the laundry.

By Laure Justice

Updated August 12, 2018

:) How to Make a Kilt Using a Kilt-Making Kit

While a kilt is similar in design to a wrap-around skirt, making one can be a challenge due to the pleats and back yoke. Purchasing a kilt-making kit reduces the time it takes to make a kilt because the pieces are cut out and the pleats are basted down along the top edge before you even start. 

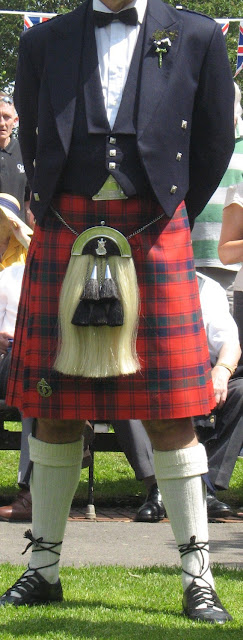
Kilt and Sporran
Kilt and Sporran image courtesy of Jongleur100 and Wikimedia Commons

Choosing and Using a Kilt-Making Kit 


If you are looking for a specific tartan, it can take some extra searching to find the right kit; but if you are not choosy - in looking for a specific tartan - you quickly can pick up a kit from an online kilt supplier.

The Items You Will Need for Making a Kilt Using a Kit


  • Kilt-making kit
  • Hand-sewing thread
  • Hand-sewing needle
  • Over-lock sewing machine with sharp needle

The Steps to Follow When Making a Kilt Using a Kit

  1. Unpack the tartan wool pieces from the kilt-making kit. Make sure everything listed on the supplies list is included. If anything is missing, contact the kilt-making kit company before you start or pick the item up from a local fabric store.
  2. Check the top edge of the pleats to make sure nothing is sticking up. If anything is sticking up, baste across the top edge using the hand-sewing thread and needle.
  3. Serge around the raw edges of each piece, using the over-lock sewing machine, to prevent fraying. Serge over the basted top edges of the pleated section, too.
  4. Attach the pleated section to the back yoke using the over-locker. Then join the side seams. Pin the waistband onto the kilt according to the pattern directions; then join the seams on the over-locker. Remove the pins as you serge.
  5. Attach the trim, using the hand-sewing thread and needle; make a tight, 1/8 inch long back-stitch to create the strongest seam possible.

Note About More Traditional Kilt Making Steps


If you want your kilt to be traditional, hand sew all of the seams using the back-stitch rather than using the over-lock machine for some. Hand sewing will take longer though, so you probably will not be done in a short amount of time.

By Laure Justice

Updated August 12, 2018

References


Thank you for visiting Stitching it Right. Comments are welcome here, on our Facebook page, or under any of the posts on our YouTube channel. Oh, and while you're checking out our videos, if you are interested in learning to sew or just picking up some tips on different techniques, please subscribe to our Sewing Lessons from Stitching it Right YouTube channel.

:) How to Wash a Kilt

A kilt is an expensive garment with special care requirements, and this short tutorial is offered to help you understand the importance of treating your kilt with extreme care.


Black Watch kilt

Black Watch kilt image (above) courtesy of Wikimedia Commons


Kilt Care Basics


By Laure Justice

If possible, it is best to avoid washing a wool kilt, according to the experts at Your Kilt. Hanging a kilt up to air out is best when possible, but if you get something on it and need to wash it, keep in mind that wool requires special care when it is wet.


Steps to Wash a Kilt

  • Fill a basin or tub with lukewarm water, and gently push the kilt into the water. 
    • Never wring or twist wet wool fibers because they easily stretch out of shape and even snap. 
  • Let the water soak into the submerged kilt for at least 15 minutes. 
  • Add a cap or scoop of wool wash, liquid is best if you have it. 
    • Avoid using other detergents and soaps. 
  • Push the kilt up and down gently in the water to slowly mix in the wool wash. 
  • Let it soak another 15 minutes. 
  • Drain the water and rinse the wool wash out with lukewarm water. 
    • Do not pick up or wring the kilt when rinsing. Let the rinse water drain away.
  • Wrap a towel around the kilt as you scoop it out of the basin or tub. 
  • Spread the towel and kilt on a sweater dryer without stretching the kilt.
  • Let the kilt air dry for about an hour. 
    • It will still be very damp. 
  • Put the kilt on a kilt hanger, make sure the pleats are hanging straight, and hang it up to finish air drying. 
Updated August 12, 2018

Thank you for visiting Stitching it Right. Comments are welcome here, on our Facebook page, or under any of the posts on our YouTube channel. Oh, and while you're checking out our videos, if you are interested in learning to sew or just picking up some tips on different techniques, please subscribe to our Sewing Lessons from Stitching it Right YouTube channel.

:) Save Money With a Vintage Winter Jacket

Recycling winter clothing is an easy way to save money on a family's clothing budget. Hand-me downs are great, but if hand-me-downs are not available, thrift stores and online auctions provide places to buy quality used clothing but there are potential problems.


Vintage Winter Jacket
Vintage Winter Jacket image courtesy of Pixabay


Choosing a Vintage Winter Jacket


By Laure Justice

There are some basic things to look for when buying and cleaning a used winter jacket or coat. Carefully selecting and caring for a pre-owned winter coat will make sure you get your money's worth out of it.

Save Money on Winter Outerwear

Parents of fast-growing children have long known the money saving benefits associated with buying pre-owned and vintage coats. Children, however, are not the only ones who are able to benefit from recycling used coats and jackets. It is possible to find high quality outerwear for people of any age.

Things to Look for When Buying a Used Coat


  • Make sure you are aware of potential problems before your spending money. 
  • Ask the seller questions if you are buying a coat online and visually inspect the coat if you are buying it in a shop.
  • Check the zipper: It is upsetting to buy a used coat, take it home, and then notice a problem like a broken zipper. 
  • The coat might be nice enough to make replacing a zipper insignificant or it might make you feel like you threw your money away on a useless coat. 
  • Inspect zippers, buttons and shoulder seams before buying a used jacket or coat. 
  • Look for stretched or loose threads in high-stress seams and threadbare spots on elbows.

Washing and Drying a Recycled Winter Coat

  1. Older coats will last longer if they are cleaned gently. Gently cleaning does not mean the coat should be worn if it is not completely clean - no one would want to do that. It means the fabric should be treated delicately.
  2. If a newly purchased used coat does not have a label that provides washing directions, soak it overnight in cold water and a mild detergent. After soaking, wash the coat either by hand or in the washing machine's gentle cycle.
  3. You can either hang dry the coat or run it through the dryer on a delicate setting. If you want to dry the coat in a dryer, set it on the cool setting. Expect to run the dryer at least 2 times to get the coat completely dry.
Thank you for visiting Stitching it Right. Comments are welcome here, on our Facebook page, or under any of the posts on our YouTube channel. Oh, and while you're checking out our videos, if you are interested in learning to sew or just picking up some tips on different techniques, please subscribe to our Sewing Lessons from Stitching it Right YouTube channel. Updated August 12, 2018

Vintage Handkerchiefs Around the House? Decorate with Heirloom Fabric Items!

Consider using vintage handkerchiefs to make charming décor pieces for your home. 


Vintage handkerchief
Vintage handkerchief image (above) courtesy Wikimedia Commons

How to Decorate With Vintage Handkerchiefs


By Laure Justice

Well-mannered women of past generations placed a great deal of value on owning a collection of beautiful, delicate handkerchiefs. This tendency has, for the most part, gone out of style. These previously prized symbols of elegance and femininity end up passed from generation to generation, or even sold in thrift stores, auctions, and garage sales.

What Can Be Done With an Heirloom Handkerchief?

One pretty, old handkerchief makes an attractive end table scarf. Sew a trim of ruffled vintage lace onto untrimmed scarves to finish the edges as an alternative to a crocheted doily. The style will resemble a doily, without spending hours upon hours crocheting.
Two handkerchiefs are the ideal size to make a vintage scarf for most dresser tops. Hand sewing the handkerchiefs together, and then hand sewing ruffled vintage lace all of the way around makes a dresser cover that protects the top of the dresser from scratches and spills.

What Can Be Done With Stained Vintage Handkerchiefs?

Textiles occasionally pick up stains during storage. This happens when the fabric is exposed to moisture, excessive heat, other fabrics, and even acids from the storage containers.

  • Soak the stained handkerchief overnight in a solution of warm water, delicate laundry detergent, and 1/4 cup washing soda crystals.
  • Gently hand wash the aged fabric in the same soapy water it soaked in.
  • Rinse the handkerchief with cold water, until the water runs clear.
  • Air dry the handkerchief.

If the stains do not come out that does not mean the handkerchief must be thrown away. Consider making small items with the fabric from the handkerchief, like a blouse for a collectible doll, or a quilt square.

Updated August 12, 2018


Thank you for visiting Stitching it Right. Comments are welcome here, on our Facebook page, or under any of the posts on our YouTube channel. Oh, and while you're checking out our videos, if you are interested in learning to sew or just picking up some tips on different techniques, please subscribe to our Sewing Lessons from Stitching it Right YouTube channel.


How to Keep Your Vintage Clothes Looking Great!


Vintage clothes can look just as nice today as they did back in the day, but only if you take care of them.

Vintage Clothes

Image of 1920's sunbather courtesy of Wikimedia Commons

How to Care for Vintage Clothes


By Laure Justice

Gently cleaning and storing your vintage clothes will have them ready to wear when you are all set to head out for a fun night with your friends (or for a romantic evening.) Before you know it your friends will be asking you to tell them your secret for keeping your vintage clothes looking so great.


Some Things You Will Need when Caring for Vintage Clothes


  • Hand sewing thread
  • Hand sewing needle
  • Delicate detergent or cold water wash
  • Washbasin
  • Luke warm water
  • Soft bristled scrub brush (optional)
  • Hanger
  • Sweater dryer (optional)
  • Iron
  • Garment bag


How-to Steps for Caring for Vintage Garments

  • Check the garment's seams really well, looking for damaged areas. If you see any weak spots in the seams, mend them before you wash the garment. Thread the hand sewing needle and mend the area using a back stitch. Make a 1/8 inch long forward stitch followed by a 1/16 inch backward stitch. Repeat the stitching until you reach the end of the damaged seam; then anchor the thread by making three stitches over the same spot and cut the thread.
  • Check the garment's care label to see how the manufacturer recommends you clean it. If it requires dry cleaning, you should really take it to the cleaner.
  • If it is safe to wash, according to the label, check the garment for stains. If you see any soiled spots, cover the stain with a layer of liquid laundry detergent. Let the detergent soak in for about fifteen minutes. 
  • Put the garment in the washbasin, add a cap of detergent, and cover the garment with lukewarm water. Let it soak for at least half an hour, so the detergent and water can do the hard part. Gently scrub heavily soiled areas of the garment, such as the underarm area and any stains, using the scrub brush. If the garment is only lightly soiled you won't need to scrub it. Rinse the clothes with clear water. Squeeze out the excess water but do not wring, or twist, because it can stretch and even break some vintage fabric fibers. Either drape the garment over a hanger or spread it on the sweater dryer to air dry.
  • Check the garment's label to see if it can safely be ironed. If it can, iron it according to the label directions after it dries. Keep the iron moving continuously to make sure you don't scorch your clothes.
  • Store the clothes hanging up in a garment bag in a dry closet, so they won't mildew or pick up a layer of dust between wearings.

Vintage Clothing Care Tips


It is quite possible some vintage garments will not have care labels, or that the labels will be too blurred to read. If this is the case taking the garment to a dry cleaner can reduce the likelihood of your vintage clothes becoming damaged when cleaned. 


As a general recommendation: avoid using fabric softener on vintage garments. Some textiles can be damaged by fabric softener, so when in doubt, err on the side of caution.


Thank you for visiting Stitching it Right. Comments are welcome here, on our Facebook page, or under any of the posts on our YouTube channel. Oh, and while you're checking out our videos, if you are interested in learning to sew or just picking up some tips on different techniques, please subscribe to our Sewing Lessons from Stitching it Right YouTube channel.

Updated August 12, 2018

Let's Get Busy Sewing! Invitation to Stitching it Right Club

 
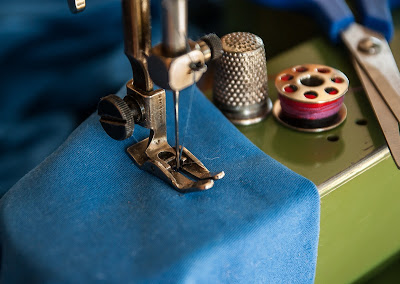
Image of sewing supplies by PKM


Sewing is re-emerging as a popular hobby after decades of being somewhat unpopular and something associated with past generations.

Some people are rediscovering the sense of pride that comes from creating something unique and with higher quality than store-bought off-the-rack clothes.

Others are finding the value in tailor-fitting their clothes so they look really good; and still others are enjoying the money-saving value in being able to properly mend damaged garments.

That doesn't even include the quilters and crafters enjoying the satisfaction of having bragging rghts to the cool, creative, and clever things they make.

Join us at the Stitching it Right Club to have fun, share sewing ideas, and get information about sewing techniques.

Welcome to Stitching it Right: Moving to New Sewing Website

You will find anything here from pictures of our latest sewing projects to how-to articles that can help you when you need to "stitch it right" yourself.

We bring you this website, along with extensive sewing experience, including home sewing and professional sewing in fashion, industrial, and upholstery fields.
Check back often to see our current projects, to get information or help with your own projects, or to leave us a comment if you need more information than you find on the site.

Come, join the new Stitching it Right Club for a fun, interactive sewing experience.

Total Pageviews