Thursday, August 30, 2018

High-Volume Sewing and Carpal Tunnel Syndrome

For the most part, someone doing household sewing or crafting doesn't have to worry too much about getting carpal tunnel syndrome. It's people who sew professionally who tend to see the kind of repetitive stress injury that leads to a carpal tunnel diagnosis. 

(I used to work in a sewing factory, and several of my co-workers had carpal tunnel pain and even surgeries for it.)


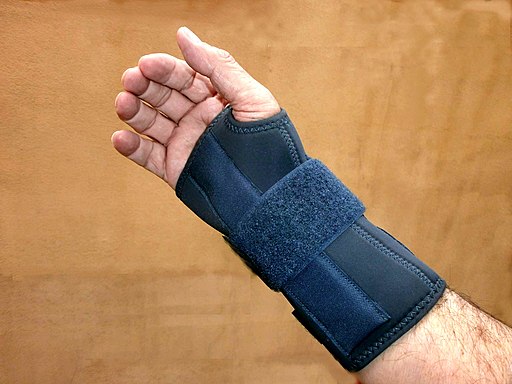
Wrist brace
Carpal tunnel wrist brace image By zyang 
(http://sabies.eu/0/Wrist_brace.jpg) 
[GFDL (http://www.gnu.org/copyleft/fdl.html) 
or CC BY 3.0  
(https://creativecommons.org/licenses/by/3.0)], via Wikimedia Commons


What to Do if You See Signs of Carpal Tunnel


So, if you're starting your own high-volume sewing business, you may need to be aware of ways to protect yourself from injury, and what to do if you start to notice carpal tunnel symptoms in yourself or your employees.

Carpal tunnel syndrome is caused by damage to a nerve in the wrist that lays alongside the carpal ligament, and according to My Carpal Tunnel, 60 million people worldwide have encountered this painful issue. 


The Link Between High-Volume Sewing and Carpal Tunnel


When you're sewing to make money, such as making a product in a factory or even putting out a large quantity of crafts to sell from home, you establish a rhythm and a way of moving efficiently, and you keep doing it over and over and over. 

With sewing, the main stress is already on your hands and wrists if you're properly seated at the machine, so if you're at all prone t repetitive stress injury, it's just kind of natural that that stress would affect your hands, wrists and forearms. 


Early Carpal Tunnel Symptoms to Watch For


If you notice a problem with carpal tunnel developing, you can sometimes slow its progression by doing some gentle forearm stretches and wearing a cockup brace that holds your hand in a slightly elevated position. 

The reason the brace helps, especially if you wear it while you sleep, is it extends the tunnel the carpal ligament runs through in your forearm. This lets swelling go down and reduces the pain. 

Just be sure to ask your doctor if a brace is right for your situation before you go get one so you don't waste your money or make your carpal tunnel symptoms worse.


Carpal Tunnel Surgery for Advanced Carpal Tunnel Syndrome

Very few people actually WANT carpal tunnel surgery, but if the pain is too intense and can't be treated by non-invasive methods, your doctor might suggest an operation. It's important to know that even after the operation, you'll have to treat your wrist with care because carpal tunnel syndrome can return even after surgery. 

What's worse, something could go wrong in the surgery, leaving you in even more pain. In a case like that, you may end up looking for a medical malpractice attorney Pittsburgh to help you with a claim of malpractice. 

Recovery from carpal tunnel surgery is a long process, too, which is another reason to be sure you need it. Sometimes the pain lets up as quickly as the same day of your surgery, according to WebMD, but you have to keep the bandages on for a week or two. Full recovery can take months. 

Your doctor will probably advise you to try some gentle wrist exercises after the surgery, and if your hand strength doesn't return, the doctor might prescribe occupational therapy to help make sure you don't end up hurting your wrist worse and needing a second surgery.

By Laure Justice


Thank you for visiting Stitching it Right. Comments are welcome here and on Facebook. And if you want to learn how to sew, it would be great if you would like and subscribe to our YouTube Sewing Lessons from Stitching it Right channel. 


Tuesday, August 21, 2018

Why Personal Branding is So Crucial to Entrepreneurial Success

Personal Branding and Entrepreneurial Success image courtesy of Pixabay


If you are setting out in the world with the goal of becoming a successful entrepreneur, you have a lot on your plate. For starters, you need to have some sort of venture – maybe a white label digital marketing company - which you are working hard to make a viable business. Everyone knows that the odds are stacked against new businesses, so you’ll have to bring something interesting and valuable to the market if you are going to stand out from the crowded field.
At the same time, you are also trying to establish yourself as a known brand in your own right. This is called personal branding, and it is particularly important for entrepreneurs. Let’s take a closer look and what it is about personal branding that makes it so valuable.

Investors Are Critical

For most businesses, getting off the ground means finding investors. You can have the greatest idea in the world for your new venture, but it probably isn’t going to go anywhere if you don’t have the necessary money behind you to get started. When looking for investors as an entrepreneur, you are basically selling yourself. The business does not yet have enough value to be of interest to the investor, so they are investing in your ability to make it profitable.
If you have a strong personal brand, it should be much easier to convince those crucial investors that you are worthy of their trust. You can point to the reputation that you have built over the years in order to demonstrate your qualifications and experience. It’s never easy to draw investors into a new venture, but it will get a little bit easier when you have a personal brand to lean on.

Opening Up Options

You never know where the business world is going to take you when attempting to go down an entrepreneurial path. Sure, the first venture you launch may take off, but that is probably not going to be the case. More likely, there will be a series of stops and starts along the way, before you eventually find your footing.
With a powerful personal brand on your side, you should have more opportunities available to you as times goes by. When others know who you are, and what you can do, it’s amazing the doors that can open. Taking the time and effort initially to lay the groundwork for your personal brand may be the difference in finding exciting opportunities or being stuck working on something that just pays the bills.

Thank you for visiting Stitching it Right! If you would like more information on starting your crafting or sewing business to help you get started on your entrepreneurial journey, be sure to check back often, join the discussion on Facebook, or check out the Sewing Lessons from Stitching it Right YouTube channel.


Wednesday, August 15, 2018

How to Design and Hand Embroider a Logo for Your Business

A logo is part of your brand. It's what helps people recognize your business when you're out in the marketplace. So, I'm working on improving mine today, and I detailed how I did it in a YouTube video on Sewing Lessons from Stitching it Right.

(If you check out the video channel, and want to learn more about sewing, please like and subscribe so you'll be notified when new video is uploaded.)
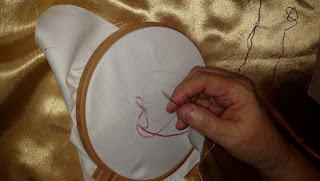
Hand Embroidering Company Logo
Hand Embroidering Company Logo image by Laure Justice


Designing a Simple Company Logo


The first step of creating a hand embroidered logo for your business is designing it. For the simple one I'm creating here, I used my computer's Paint program.

I knew I wanted my logo to reflect the fact that I love sewing, so I really wanted it to be a heart themed design.

It didn't take me long to create a dual heart logo, because I loved its simplicity as soon as I saw the pink heart surrounding the red heart.

I had actually planned to create something intricate and detailed, but when I hit on the look that resonated with me so easily, It didn't make sense to add more.

Using Hand Embroidery to Enhance the Appearance of a Company Logo


I used the stem stitch to create the borders, which are the drawn lines on the fabric.

I used a fabric marking pencil to mark out the shapes, as shown in video, so they will wash out if needed.

To add texture to the white strip between the two hearts, I added satin stitching.

(This isn't shown in the video because I didn't want to keep anyone sitting at the computer watching the same stitch over and over.)

Video Showing How to Hand Embroider a Self-Drafted Logo


Some other ways to come up with a logo are having a design company create one for you or visiting a site that has extra tools so you can add more to your own self-drafted logo designs.

It's a great idea to experiment with colors and shapes until you come up with something that really speaks to you and your vision for your business.

Like I mentioned, I wanted my logo to reflect my passion for sewing, so I picked hearts, and of course, for me, the logo needs to be sewn to really reflect what my business is about.

By: Laure Justice

Comments are always welcome here, on the above-mentioned Sewing Lessons from Stitching it Right video channel, or on the Stitching it Right Facebook page.


Monday, August 13, 2018

How to Use Fabric Adhesive to Mend a Small Hole in Clothes

While sewing is an ideal way to fix a hole torn in pants, or any other garment, iron-on patches and patches glued on with fabric adhesive are also worthwhile parts of the garment mending process.

Fabric Adhesive to Mend a Hole
Fabric Adhesive to Mend a Hole in Clothes image by Laure Justice


Tips for Using Fabric Adhesive to Mend a Hole in Clothes


Unless the support patch you're applying is a perfect match for the fabric that has a torn spot you're covering, it's ideal to put the support patch on the wrong side of the fabric.

A support patch is just a patch of fabric that's used to strengthen damaged fabric, and if you're using fabric glue, to catch loose fibers around the hole.

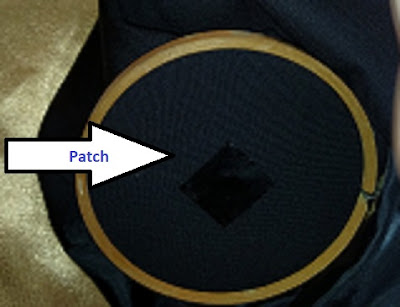
The patch in the image below is a bit hard to see, but I'll give you some details...

I applied Fabric Fusion permanent fabric adhesive to a small silk square. I applied a thin layer because the fabric is thin, BUT - it didn't adhere - it needed a thicker layer of fabric glue.

(By the way: That's an affiliate link, which means, if you click it and buy Fabric Fusion through it, I'll earn a few cents from the purchase - BUT - it doesn't EVER affect the price you would pay.)


Glued-on Fabric Patch
Glued-on Fabric Patch image by Laure Justice


I kept the amount of glue used to a minimum because I didn't want it to soak through the thin fabric of the pants.

Since a few frayed spots still show, once the glue dried, I used a fine back thread to gently weave around the hole and stitch the patch in place for extra security.

Video Showing How to Apply Fabric Glue to a Patch for Mending Pants


Thank you for visiting Stitching it Right. Comments are welcome here, on our Facebook page, or under any of the posts on our YouTube channel. Oh, and while you're checking out our videos, if you are interested in learning to sew or just picking up some tips on different techniques, please subscribe to our Sewing Lessons from Stitching it Right YouTube channel.

By: Laure Justice

Sunday, August 12, 2018

Why You Should Iron While Sewing

If I were asked to choose which part of sewing is the most important to creating a successful project, I don't think I could choose between cutting, sewing, and ironing, because they're all key parts. I would even add that preshrinking the fabric is pretty vital with some fabrics, but that's another story for another day.

Iron When Sewing
Why You Need to Iron When Sewing image by Laure Justice


The Importance of Ironing When Sewing


It's fairly common for people who are new to sewing to underestimate the importance of ironing when sewing. I know, for me, I spent a lot of time on projects that just came out... well... lousy.

It was always disappointing, and such a waste of time and fabric. My lesson in this came fairly early in my sewing 'career' - though I have on occasion forgotten and was always quickly reminded by wrinkles and puckered seams.


Always check the care information on the fabric, or test in a small spot if you don't have the information handy, before pressing your fabric with a hot iron. 


If you don't want to prewash your fabric, you can press it with a steam iron or damp pressing cloth to successfully preshrink it.

Why Preshrinking Is So Important


If you're making clothes or anything to a specific size but you don't preshrink the fabric, when you end up laundering the completed item, it could shrink and all your work could be lost because it won't maintain its size.

If you're making things to sell, you may not want to launder the fabric in order to maintain its crispness and unwashed, new feeling - and that's a great time to use your iron to prepare the fabric.

The dampness of the steam or damp pressing cloth provides enough moisture to let the iron's heat shrink the fabric fibers.

Video Showing How Much Difference Pressing Fabric Makes

This video shows the difference when your fabric is un-ironed and after it's been ironed. (I'll be back with another video to show how to press seams when you're sewing.)


Thank you for visiting Stitching it Right. Comments are always welcomed both here and on Facebook, and if you're interested, it would mean so much to me if you would like and subscribe to my Sewing Lessons From Stitching it Right Video Channel on YouTube.

Friday, August 10, 2018

Embroidery Embellishments to Cover Stains

Clothing takes up a big part of a family's budget, so if something gets a stain that won't wash out, finding a way to embellish it can keep your garment looking nice.

Video Showing Flower Embroidery to Cover a Stain


This short video tutorial shows how to make a textured and embroidered rose to cover a stain, but any design or even an applique could be used for someone who doesn't want a rose embroidered on their clothing.


I've used this technique to turn stains into flowers on garments and a quilt I had made that caught a nasty spill and stains wouldn't come out.

Tips for Disguising Stains on a Quilt

On the quilt, it had stains all over it and looked really awful.

I had obviously spent hours and hours making this quilt, so I was really upset when it got stained, but life goes on, and I wanted to save it.

I started looking at options, and considered using fabric paint to make a design over the stains, but I wanted to maintain the classic quilt look as much as possible.

Using this hand embroidery technique saved it and actually added a unique look to it, almost like someone had scattered a handful of colorful flowers across it.

Thanks for visiting Stitching it Right! Comments are welcome here or on Facebook, and if you're interested in learning new sewing techniques, please like and subscribe to my YouTube channel.

Thursday, August 9, 2018

How to Fix a Hole in Pants or Shorts

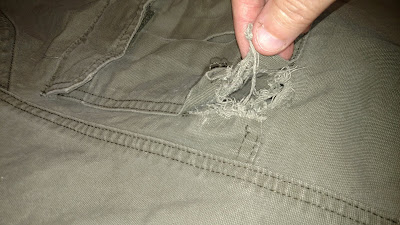
This post covers how to fix a hole in pants with an iron-on patch and how to sew a cargo pocket back on after it rips.


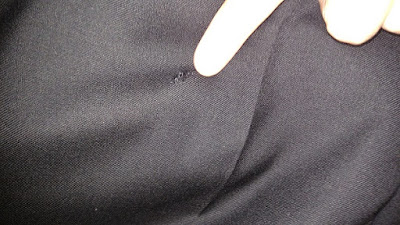
Hole in Shorts
Hole in Shorts image by Laure Justice


Fix a Hole in Pants or Shorts With a  Cargo Pocket


If the fabric is frayed and weakened, it's best to put some kind of stabilizing support on the fabric.

I used an iron-on patch for this tutorial, though with some types of fabric you have to just stitch the patch in place to strengthen the fabric.

Iron-on patches are great for some types of repairs, and if you're in a hurry, you can apply an iron-on patch and go where you need to go, but you'll want to sew it in place later because they don't always stay put.

Be sure to check the care tag on the garment you're fixing to make sure it can withstand the wool setting on your iron - synthetics can melt if you try to put iron-on patches on them.


iron-on patches
Iron-on patches image by Laure Justice


Turn the garment inside-out and apply the patch on the back of the fabric for the best result if there's any color variation between the patch and the garment.

Video Showing How to Apply an Iron-On Patch


Iron-on Patches are one of my favorite sewing hacks when I need to mend clothing, but like I mentioned, they won't work in every situation. 

In addition to not working on synthetic fibers, they aren't very effective on stretchy fabrics because the patches aren't stretchy. 

Video Showing How to Stitch the Pocket Back On

This video has some sound problems and cuts out - so I want to mention that the closed captioning can be turned on by clicking the (CC) icon so you can follow along with the text until I figure out how to do a voiceover or re-record this episode (with a  different pair of pants.)


With the patch in place to strengthen the fabric, turn the garment right-side-out, then follow the original stitch lines wherever possible.

If you need to sew off the original seams, try to sew parallel to the original lines to make it look like the stitching belongs there.

Thanks for visiting Stitching it Right. Comments are always welcome, and it would be great if you visit us on Facebook and Subscribe to the Sewing Lessons from Stitching it Right YouTube channel. 

Laure

Wednesday, August 8, 2018

When and How to Change Your Sewing Machine Needle

The needle in your sewing machine is an important part of how your sewing machine functions. If it gets dull, gets a burr, or breaks, then you need to change your sewing machine needle, and this article explains a bit more about the why and how of performing this simple sewing machine maintenance task.

Sewing Machine Needles image by Laure Justice

Reasons to Change a Sewing Machine Needle


A bad needle can cause a variety of problems when you're sewing. Things like skipped stitches and loose stitches are a problem, and sometimes a little thing like a problem with your sewing machine needle can even damage your sewing machine. Some reasons to put a new needle in your sewing machine include: 
  • Broken needles: A broken needle in your machine is usually fairly obvious, the tip and eye will be gone if the needle breaks. 
    • If your vision is like mine, though, you may need magnifying glasses to be sure if the break is only on the tip.
  • Dull needles: A dull needle can damage the fabric as it cuts the fibers in your fabric instead of pushing through properly. 
    • It can also cause the needle to make a heavy, thud sound as it hits the fabric.
  • Bent needles: A bent needle can damage your sewing machine and even send shards of sharp metal flying around you if it hits your machine's presser foot or face plate and breaks. 
    • This is why you should ALWAYS wear glasses of some kind when you sew and keep young children at a safe distance.
    • I had a needle break on my industrial machine once and it shattered a light bulb! 
  • Burred needles: A burred needle can cause skipped stitches.
    • A burr on a needle feels like a tiny hook if you slide your finger over it.
    • If you suspect a burred hook you should change the needle even if you can't actually feel a rough spot on your needle. 
  • Sewing different types of fabric: Needles are made for different types of fabric, such as a ballpoint for knit, sharps for woven, and a universal point if you frequently switch fabrics.
    • Needles also come in different gauges to accommodate different fabric thicknesses.
  • It's just time: Experts recommend changing your sewing machine needle after every eight hours of sewing time, even if it's still working okay. 
    • Friction and the constant impact of the needle tip hitting the fabric weakens the metal and dulls the tip, so it's really ideal to change needles frequently. 

Video Showing How to Change a Sewing Machine Needle


If you enjoy the video and would like to see more sewing lessons, please like the video and subscribe to my channel. Questions and comments are welcome here, on the Facebook page, or in the comments section under the video on YouTube.
Thanks for visiting Stitching it Right,
Laure 

Tuesday, August 7, 2018

Complete Freehand Flower Embroidery Project

I wanted to show the entire process of how to make a freehand flower embroidery design in my videos, so I filmed each section of the process as a shorter segment, then I put all the segments together in one longer video.

Freehand Embroidery Flower Design Project image and article by Laure Justice

Freehand Embroidery Flower Design


If you want to make your own embroidery flower design using these directions, you'll notice in the video everything is shown in the order I did it.

I originally started this embroidery project thinking I would make it into a quilt square, but I decided I am going to make it into a small wall-hanging to display with some of my other stitched creations behind my comfortable sewing chair.

(That way, when I film episodes of Sewing Lessons from Stitching it Right, some of my small sewing projects will be displayed right behind me - and if you want to make them yourself, you can simply look for matching video sewing lessons.)

Video of Complete Flower Embroidery Project from Beginning to End


If you just want to refresh your skills on a specific embroidery stitch instead of watching the full length film, there are short episodes available on the channel that are designed to help you master each type of stitch.

Thanks for visiting Stitching it Right, comments are welcome and it would be so great if you join the conversation on Facebook or visit the YouTube channel so you can subscribe and leave a comment.

Laure

Monday, August 6, 2018

How to Make a Freehand Embroidery Flower

Making a freehand embroidery flower is so easy, and it really only requires knowing a couple of stitches, the straight stitch and either the back stitch or the stem stitch are enough to get you through the entire process if you want to keep it simple.

Flower Embroidery image by Laure Justice

Tips for Hand Sewing an Embroidered Flower


When you're doing freehand embroidery, simple designs like the flower shown here and in the video let you make an eye-catching piece without investing a lot of time into the project.

One thing I especially love about doing freehand embroidery is, it's so relaxing and even if a stitch lands in the wrong spot, you can just keep stitching and still end up with a nice embroidery design.

These types of embroidered flowers can be as big or as small as you like, and you can make a single embroidered flower or a field of them.

Freehand Embroidery to Cover Stains


Freehand Flower Embroidery 
image by Laure Justice
You can also use these freehand flower embroidery designs to cover small stains on clothes in addition to making home décor items like pillows, quilts, and wall-hangings.

(If you do attempt to cover a stain on a good garment, however, do embroider a practice flower on a fabric scrap to make sure it looks the way you want so you don't ruin your garment if it doesn't look how you expect it to look.)

Video Lesson Showing How to Stitch an Embroidery Flower

This a freehand flower embroidery I put together as part of a series to show how to make this quilt square.

The videos are posted in short segments to make it easy to follow along and so you can watch only the parts you need for making your own freehand embroidery designs.


Thanks for checking out this article, questions are welcome here, on Facebook, or in the comments under the videos in our YouTube channel.

If you visit the channel, please consider subscribing - I'm trying to grow the channel and it would really help me out if you subscribe.

Laure

Friday, August 3, 2018

How to Do the Chain Stitch Hand Embroidery

I like to use the chain stitch as a textured border in my hand embroidery work, and it's so easy to do as long as you go through the process step by step.

In the video below, I show how to do the chain stitch, but I'm not sure I detailed each step carefully enough.

So, I want to add a written tutorial here to help if you're trying to learn how to make the chain stitch.


Hand Embroidery Chain Stitch
Hand Embroidery Chain Stitch image by Christie, Grace [CC0], via Wikimedia Commons

About the Hand Embroidery Chain Stitch


To get started, stretch the fabric in the embroidery hoop so it's fairly snug, with just a small amount of play.

If the fabric is stretched too tightly, it's harder to work the needle through the fabric.

  1. Thread the needle and knot the end of the embroidery floss.
  2. Bring the needle up through the fabric at the desired starting point.
  3. Move the needle tip over just a fiber or two in the fabric, then poke the tip down through and bring the tip back up through the fabric about 1/8-inch to 1/4-inch forward on the line of chain stitching you are creating. 
  4. Loop the embroidery floss forward and under the tip of the needle before pulling the needle through.
    1. Tug slowly on the needle to prevent knotting, and hold the floss down gently if it starts to twist or it can form a knot that's hard to get out.
  5. Move the needle's tip just over the embroidery floss and poke it down through the fabric, then work it back through the fabric's surface to form the next stitch in the chain. 
  6. Keep going until you reach the end of your chain or embroidery floss (whichever comes first) then anchor the chain stitches with a couple tiny stitches on the fabric's back.

Video of Hand Embroidery Chain Stitch


I'm considering reshooting this hand embroidery chain stitch video, so if you need more help with the chain stitch, or any kind of embroidery stitch, feel free to leave a request in the comments here, on my YouTube channel, or in the Facebook group associated with this site.


I'm trying to get more Likes and subscribers on my YouTube channel, so if you're interested in seeing more sewing lessons, it would really help me out if you visit my sewing tutorial channel and click the thumbs-up icon and the Subscribe button.


Thanks for visiting Stitching it Right,
Laure 

Thursday, August 2, 2018

Info About Fabric Marking Pencils, Fabric Marking Pens, and Tailor's Chalk

Fabric marking pencils, fabric marking pens, and tailor's chalk have a variety of uses in sewing and crafting, and the main advantage of all these fabric marking supplies is that none of them leave a permanent mark on your sewing projects.

Fabric Marking Pencils, Fabric Marking Pens, and Tailor's Chalk image courtesy of Pixabay

Using Fabric Marking Pencils, Fabric Marking Pens, and Tailor's Chalk


Fabric marking pencils, pens and tailor's chalk are useful when you're creating your own embroidery designs, quilting, when you're sewing from a pattern and need to mark the darts or areas where basting is needed, and when you're doing alterations on garments or home décor items like curtains.

Try to match your fabric marking pen, pencil, or chalk to the fabric you're using and the type of sewing you're doing.

Fabric Marking Pencils


I especially like fabric marking pencils when I'm working with hand sewing and embroidery projects, though they work well with most woven textiles.

Fabric marking pencils make a light line, though by pressing harder you can make the line darker.

Fabric pencils work great on light weight, woven fabrics, and when the tip wears down, all you need to do is sharpen them in a pencil sharpener.

You may want a dedicated sharpener, though, to make sure you don't end up with regular pencil lead on your clothes or projects.

Fabric Marking Pens


Fabric marking pens make a bolder line on fabric that wipes away either with water or an included eraser.

These are great when you have a harder time seeing the markings.

The ink in fabric marking pens can take longer to clean off than the other forms, plus it can be hard to see this type of ink on dark surfaces, so if you're sewing something like black or navy blue fabric, you might find another option more suitable.

(If you use these pens, please let us know what you think.)

Tailor's Chalk


Tailor's chalk, like shown in the image above, has been around for over a hundred years, and it's still an effective way to mark many types of fabric without creating stains.

The original tailor's chalk was a kind of waxy, chalky crayon that first entered the market in 1906.

I've found there are some things I like to use tailor's chalk for, especially garment making to copy marks from patterns onto fabric - and things I don't like it for - like anything that needs handled a lot.

The 'dusty' nature of tailor's chalk means it can flake away if you handle the piece you're working on a lot.

Video Showing How to Use a Fabric Marking Pencil for Embroidery

In the video, I'm marking the line where I plan to put the chain stitch in this freehand embroidery design.


The line for the chain stitch to follow is the only thing I've drawn out on this design, and I added it because I wanted to show you the fabric marking pencil. 

Each type of fabric marking media - fabric marking pencils, pens, and tailor's chalk - serves a different purpose when you're sewing and crafting because of the way each one stays (or flakes off of) the fabric.

Thanks for visiting Stitching it Right, if you're loking for more information about how to sew, be sure to subscribe to the Sewing Lessons from Stitching it Right YouTube channel and if you 'do' social media, visit us on Facebook, too.

Wednesday, August 1, 2018

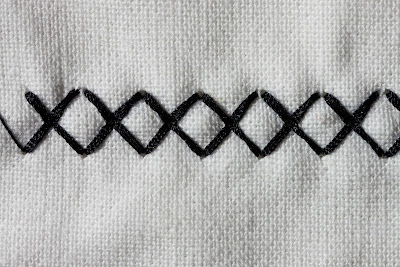
How to Do the Cross Stitch in Hand Embroidery

I really like doing the cross stitch in hand embroidery as a way to add texture and delicate color to things like baskets (to show the weave) and it makes a charming border, too. It's also used in counted cross stitch.


Hand Embroidery Cross Stitch
Hand Embroidery Cross Stitch image courtesy of Pixabay


How to Hand Embroider the Cross Stitch


One popular way to do the cross stitch, especially if you're new to hand embroidery, is by getting an iron-on embroidery pattern to follow.

An iron-on embroidery pattern can actually be a big help when you're first learning this hand sewing technique, because, as you'll see in the video below, it can be challenging to keep your stitches straight when you're doing freehand embroidery.

Steps for Cross Stitching in Embroidery

  • Bring the needle up through the fabric from the back side - at the desired starting point. 
  • Bring the needle's tip to the next point, on the diagonal, and then push it down through the fabric.
  • Pull the embroidery floss until it's snug.
  • Bring the needle's tip over to the spot beside the first spot where you brought it up through the fabric. (That sounds a bit confusing, so if I lost you there, definitely check out the video to see it.)
  • Repeat the stitching until you've formed all the cross stitches you need to add in that color of embroidery floss. 
  • Anchor the stitching with a couple of tiny stitches on the back side of the fabric - positioned so it's under another stitch so it doesn't show. 

Video of Making the Cross Stitch in Hand Embroidery


With this video of the cross stitch, I'm just about through the basic hand embroidery stitches, and I'll be moving into turning the different stitches into a complete design.

If you enjoy the videos, it would be so great if you would subscribe to my YouTube channel. Plus, comments are always welcome here on the website and the Stitching it Right Sewing Talk Facebook group or page are also open for questions, sharing your creations, and just talking about sewing so feel free to join us there anytime.

Total Pageviews