Wednesday, July 12, 2017

A Guide on How To Clean Car Upholstery

Clean car upholstery image courtesy of Pixabay

By Donna Scott

Car maintenance goes way beyond the basic and commonly known repair and fuelling. It also involves car cleaning, particularly upholstery cleaning. Several people frown at the thought of doing the upholstery perhaps, because of what they have heard from their friends who claim that cleaning the interior of the car is not only difficult but also almost impossible for just a car owner to do. Therefore, most people will simply stick to vacuuming which never does it well as it should be done. After vacuuming your car, you are likely to leave behind tough stains of spills, since this only gets rid of dust and nothing more. The problem comes in if you leave these stains for longer periods; they become impossible to remove without damaging your car upholstery. Surprisingly, cleaning the interior of your car cannot get that tough if you know what to do. It is very important that you clean the inside of your car as often as you can because not only won’t you have to deal with problems of tough stains from spills, but also you will boost your car resale if you wish to dispose it and get a new one. Below is a guide on how to clean car upholstery.

Things you might need

Dealing with spill stains requires immediate attention, but this is almost impossible while driving. It only means they will stay for some time and become tough stains. When cleaning your car upholstery and dealing with tough stains, you will need more than just soap and water; you will have to gather all the tools you can get so as to simplify the cleaning process entirely. Here are some of the things you might need in the process;

• Vacuum

• Microfiber cloths

• Soft, clean sponge or cloth

• Bucket of water

• Soft bristle scrubbing brush

When cleaning the interior of your car, you need something that will give you excellent performance and desirable results. Well, it is important that you be aware of why you need these kinds of cleaners. You need them because you may not get a better job done without the help of one. For instance, if you get these cleaners on the job, you are sure to get a deep cleaning of all seats, including back and headrests, the carpet plus the boot areas. You will need both the general and heavy-duty Car and upholstery cleaners to help you clean the car seats, carpets and the full interior of your car without leaving any stone unturned. This is because general, and heavy-duty upholstery cleaners, such as Meguiar’s all-purpose cleaner, 3D upholstery and carpet shampoo, among others are products are specifically meant for cleaning and maintaining car interior and upholstery. Moreover, you will do the cleaning and sanitize all the door panels, pillars, and dashboards.


Image of clean car seats courtesy of Pixabay

Cleaning spill stains


Just like mentioned earlier on, for a successful spill stain cleaning, you need to act on it immediately. This is because if left for longer periods they turn out to be tough stains you cannot get rid of in one wash. If you want to deal with spill stains immediately; blotting is the way to go because it will help you pull the stain out of the fabric. But if it is a stubborn stain, here is how to go about it:

Step 1: Take your upholstery cleaner which you had picked earlier on. In most cases, the car upholstery cleaner you have will be multi-purpose; it can work both on carpet and upholstery, so expect it to do a good job on the spill stain.

Step 2: Apply the cleaner on the spill stain. Well, to do this, shake the cleaner properly and then hold it upright as you spray evenly on the spot. Use a damp cloth to scrub clean the stain if need be upon which you can wipe it using a dry piece of cloth and voila!

Cleaning Dirt and grime 


If you want to get rid of dirt and grime stains from your upholstery, then consider going through the following steps:

Step 1: Test the product. Above everything else, test the product if you are using it for the first time on your upholstery because it might stain your fabric or even worse discolor the fabric. Do this on an inconspicuous area just to make sure it is right for use without any unnecessary damages on your fabric or leather. 

Step 2: Apply the product. After testing and you are sure it is fit for use on your fabric or leather, apply it using the directions provided by the manufacturer and let it soak for a few minutes.

Step 3: Scrub the stain. Using a microfiber cloth, scrub the stain with water. But if the stain persists, consider using a microfiber cloth or soft bristled scrub brush, as this will help you eliminate the stubborn stains.

Step 4: After scrubbing and cleaning, use water to rinse the spot. Ideally, be sure to use a clean microfiber cloth to remove debris and the entire cleaning product.

Cleaning grease or oil stains


Cleaning grease and oil stains will prove a bit of a challenge to most people. This is owed to the extent of damage and also because they are just never easy to handle. But with the following options, all the grease and oil will be gone in no time.

Alternative A: Use paint thinner. Add paint thinner to two equal parts water to clean the greasy and oily spots. Use a clean cloth to apply the solution on the stain spot. To help pull out the stain, dab the solution using a piece of cloth on the greasy or oily stain. Once the stain is all gone, clean the spot again using water to remove excess paint thinner solution and debris. Remember to test the solution on an invisible area to ensure it is appropriate before use.

Alternative B: use of detergent. This involves the use of readily available household detergent to help clean the greasy spot. Apply a few drops of the detergent to the oily spot to help loosen the greasy spot. Let it sit for a few minutes before cleaning. Finally, apply the blotting technique to help pull up the oily spot and clean thoroughly using water.


General cleaning


Maintaining a clean car with spotless upholstery require regular general cleaning of the car’s interior.
Especially the seats, here is how to go about it:

To clean leather seats


Cleaning leather seats require a special type of cleaners which are available on the market. Similarly, if you are a DIY enthusiast, you can choose to go for a home-made leather cleaner which involves mixing one part vinegar and two parts in-seed oil. Whichever leather cleaner you choose, here is how to use it to clean your leather seats:

Step 1: Spray the solution. Once you have tested and are sure, the solution won’t do damage to your seats, spray the solution directly on the seat.

Step 2: Use a soft wet piece of cloth to apply the cleaning product on the leather and let it sit for a while before scrubbing.

Step 3: Use a soft brush to give the leather a deep cleaning to remove all sorts of dirt and stains.

Step 4: Use water to wash off the cleaning product at this point because the seats will be clean. If not, re-do the procedure from the first step.

Step 5: After you have ensured the seats are spotlessly clean, use a conditioner, which is pH neutral to help keep the seats soft.

Do not forget to clean the seams of the seat using a soft brush to leave the whole seat cleaned.

To clean fabric seats


Cleaning fabric seats are also as simple as cleaning the leather seats. Again here, you can choose to either buy the cleaning products or only use the ones you can easily find at home; both will work just fine! With all the cleaning tools ready, clean your fabric car seats in the following steps.

Step 1: Vacuum up the seats to remove all the dirt that might get into the seats while washing them. This you can do using a soft brush or your household vacuum cleaner.

Step 2: Add your household detergent into a bucket of hot water. Using a sponge or soft piece of cloth, soak it in the bucket of hot water and detergent to scrub the seats. Be careful not to make them too wet.

Step 3: Once your seats are evenly moistened and are spotlessly clean, dip a clean microfiber cloth in cold water and use it to remove excess dirt and detergent from the surface of the seats. The seats should be clean by now; if not, repeat the process again for better results.

Cleaning your car’s interior doesn’t have to be difficult if you do it frequently. Ensure that you have it cleaned as often as possible. And most of the time, try to keep food and drinks out of your car to reduce the chances of stained car upholstery.

Thursday, June 29, 2017

Learn to Sew: Sewing Machine Tips

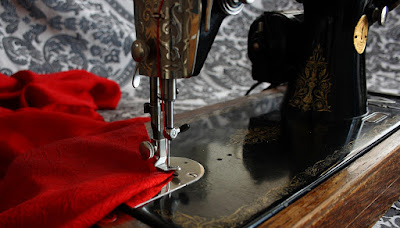
When you are learning how to use a sewing machine it can seem a little daunting at first, but the good news is that it's not as hard as you may think. If you want to learn to sew, it is a very valuable skill to have and once you have it down it will be as basic as breathing.

Learn to Sew: Sewing Machine Tips image courtesy of Pixabay

Types of Sewing Machines

First off, there are many different types of sewing machines out there and they are not all universal. This means that you will need to refer to the sewing machine manual that comes with your machine to properly thread your specific machine and other such things.

Once you have your sewing machine threaded, it's a good idea to start with a small project to begin with. You can even practice on a scrap of fabric just so you get familiar with sewing on your machine.

Cotton is a good fabric to begin with because it will not stretch and be hard to work with. I recommended an easy pattern from the craft store because you will get to create a cool keepsake in the end.

Sewing Techniques for Beginners


There are many different sewing techniques you can try and most machines come with different stitch lengths and patterns to choose from, such as the straight stich, zigzag stitch, and so on.

There are also different sewing speeds and stitch lengths that you can choose from, and a lot of it is trial and error. It's helpful to practice on your scrap of fabric before working on your project to make sure your stitches look good.

It's good to get your sewing basics down like sewing straight, backwards, and getting comfortable with your machine, because then there really isn't anything that you can't sew. Start small and work your way to harder projects as your skills begin to increase.

Thursday, June 15, 2017

Beat the Summer Heat with Sewing

Sewing clothes and making crafts is therapeutic for the soul. Are you not wanting to spend your summer days in the summer heat? Sewing is a great alternative for those who want quiet, calm and productive time inside. I am going to review some great easy sewing projects that will keep you busy while making treasure that your friends and family will adore!

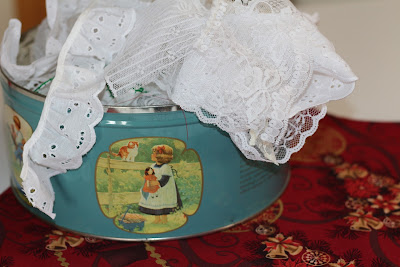
https://pixabay.com/en/lace-sewing-handmade-craft-sew-1325740/
Add lace to a tank top for a summer sewing project

Summer Sewing for Teacher Gifts

Do you live in a state that gets really cold in winter? Do you have children going to school? Then consider making a flannel thermos jacket for a teacher! When choosing patterns, simply find a bright and colorful flannel design. Then, measure the circumference of the thermos and cut accordingly. Sew the outside edges in, to create a rounded and finished looking edge. To attach the two ends around the thermos, use hook and loop tape or a button and loophole!

Summer Sewing for Women

To make something for yourself, simply find an inexpensive, blank cotton tank top and lace. Measure the lace around the shoulder straps, and cut so that the lace is slightly hanging off the shoulder. Play with colors on this one. Black and white is a classic combination. Blue and white will look nautical, and peach and white are perfect for summer! This fun and easy to make top will be your new favorite.

Summer Sewing Ideas for Men

Does your child love helping you in the kitchen? Then make your little one an apron! Start by choosing an animal. To make a cat apron, buy the colored fabric that you need. Measure your child, and how long you want it to be, and how far around it needs to go. It helps if you draw the design and then cut the fabric. The ears will go along the straps, the whiskers will be on the chest and the tie around the waist will be the tail!

Friday, February 10, 2017

How to Pack a Handy Sewing Kit

When you are trying to find time to sew in your busy days, it can really help to pack a handy sewing kit to take along. A portable sewing project kit holds everything you need to work on so you can tackle needlework tasks in small pockets of time. Read on to pick up a few useful tips.

How to Pack a Handy Sewing Kit
How to Pack a Handy Sewing Kit image Courtesy of Pixabay


How to Pack a Handy Sewing Kit

By: Laure Justice

To get started on making a portable sewing kit, keep in mind that a sewing project that is small in size is most convenient, like adding an embroidery design to a hand towel or stitching a few quilt squares together.

Choose a Sewing Kit Container

Start by choosing a container for your sewing supplies, considering things like size and the type of material you want the kit to be mode from, for durability or flexibility.

  • For example, if you need to tuck your sewing kit in a purse, briefcase, or backpack, you need to choose a container or sewing wallet that fits in your bag. 
  • If you think it may get bumped around in your bag, you need to choose a case made from durable material, and that seals securely so it will not pop open if it gets bumped.

Choose a Portable Sewing Project to Pack in Your Sewing Kit

Almost anything you want to work on can be adapted for a portable sewing kit, but big things take extra planning, and might not be as convenient.

If you choose a small handheld piece of needlework, for example, it is going to be easier to pull it out and work on it in your spare time - compared to a large item that has to be spread out and completely readjusted with every few stitches.

It can be part of a larger project, but you ideally need to be able to tuck the part you want to work on in your sewing kit.

Pack Your Sewing Kit

So, here's the part this article is really about, though choosing your container and project are important.

Set out (as needed for each individual project):

  • Container
  • Fabric pieces to be sewn
  • Thread or embroidery floss
  • Needle (Thread the needle so you can just grab it and start working - it is easier and it reduces the chance of losing your needle.)
  • Small scissors or snips
  • Magnetic pincushion (again, for your needle and any pins in your project)
  • Small embroidery hoop (if embroidering)
Pack Your Sewing Kit
  • Put the fabric and largest items in the kit first, then tuck smaller items in around the edges of the case. 
  • Remember to stick with the basics - if you overload this handy sewing kit, it isn't going to be handy anymore - it's going to be a nuisance because it will spill each time you open it. 
  • The point of this type of kit is that it is easy to take along anywhere and that it makes it easy to fit sewing projects into pockets of spare time, or any time you just really need a creativity break to restore your spirits. 
Thanks for reading, and be sure to pop back and let me know how it goes if you make your own portable sewing kit.

Wednesday, February 8, 2017

How to Find Time to Sew

Sewing is relaxing, and it is a fun way to release your inner creativity, but life is busy, so how do you find time to sew? Read on for a few easy tips.

How to Find Time to Sew
How to Find Time to Sew image courtesy of Pixabay

How to Find Time to Sew

By Laure Justice
It's so common for us to put the things we enjoy aside while we're dealing with the day to day challenges of life, and things like creative hobbies (ahem... sewing) are often the first things we skip.

We shouldn't do that, though, and here's why... releasing your creativity leads to you being your best self.

Sewing is More Than Just the Act of Stitching Something

If you are mending something, you might not get a lot of chance to express your creativity, but even with mending, you get a chance to feel good about extending the useful life of a garment or decor item.

More than just the stitches you run through the fabric, though, is the experience of turning a plain piece of fabric into a useful, attractive thing, plus, being able to say you made it yourself.

But, life is busy, so, how do you find time to sew?

Think Small

By think small, I don't mean you can only make little things. I mean, break your projects into increments you can do in short time pockets throughout your day or week.

For example, if you want to make a pair of jeans, but don't have time to do it all at once, get everything ready in one pocket of time. Then, lay out the fabric and pattern in another - if you can't leave it out with pins in it - like if you have kids or pets - you may need time to go ahead and cut. Then, break each segment of the directions into things you can do a bit at a time. It will take longer, but you'll get it done. Compared to if you try to do it all at once and never get to it.

Set a Timer

If you know you only have ten minutes to spare, set a timer and enjoy. Even if it's not long, it is your YOU time, and you deserve it.

Prepare a Handy Kit

You can use a tote bag, an old purse, or even a plastic crayon container for this. Just tuck a small piece of handiwork, like a towel you want to embroider or some bead work you want to do, in the container. Include thread or embroidery floss, a small pair of sewing scissors or snips, and your needle and you can get some stitching time in on lunch break, when you're waiting at the doctor's office, or any time you end up with a few free minutes.

If sewing makes you happy, there are so many ways to fit time for it into your life, so go ahead, enjoy your creative time. You deserve it.

Thursday, January 26, 2017

Stitching it Right Sewing Boxes Coming Soon

A new big thing in the works for this site are Stitching it Right Boxes!

This project has been in the works for SO long, and I'm so excited to let you know our first kits are almost ready to ship! (Along with the corresponding videos to make sure you know how to do each and every step!)

This has been taking longer to set up than I expected, but the video channel is live and the kits are in development.

What Is a Stitching it Right Sewing Box?

Stitching it Right Boxes are kits put together to provide you everything you need to complete one project (minus the sewing machine), and they are going to be sold through a subscription service.

You can choose monthly or bi-monthly delivery, set your skill level, tell us whether you want to do a craft or a garment, and, because so many people hate cutting out the pieces, you get to choose whether you want the pieces pre-cut or you want to do the cutting yourself.

What Are the Advantages of Pre-Packed Sewing Boxes From Stitching it Right?

Stitching it Right Boxes are designed to let you enjoy the experience of creating things yourself, giving you full bragging rights for your creations, without spending time trying to figure out which fabric is right for your pattern and saving you time prepping the fabric (if you opt for boxes with  pre-cut fabric.)

What Is Included in These Sewing Boxes?


  • These boxes include your pattern, in case you want to make more versions of your item after you complete the kit.
  • Fabric (Precut or by the appropriate yardage to complete the project.)
  • Notions - thread, buttons, decals, lace, etc. 
  • Directions

What Else?

In addition to everything you need to complete the project, Stitching it Right is offering extra support through this site, with a scheduled chat time once a week and other times available by appointment -  and a YouTube channel is in the works, where I'll be showing how to handle the steps in each project, so you can watch the steps of each project being completed if you get stuck.

If you have any questions about these fun, complete sewing boxes from Stitching it Right, be sure to ask in the comments and I'll get an answer to you right away.

Sunday, January 1, 2017

Happy New Year!

I just wanted to pop in and wish everyone a Happy New Year on behalf of Stitching it Right!
I hope 2017 brings you peace, prosperity, and anything you want and need from your life.
Please check back often, and feel free to leave a comment anytime you feel inspired to do so.
All the best,
Laure

Total Pageviews