
Sewing lessons and tutorials... Learn how to sew or pick up some new sewing techniques
Thursday, December 3, 2015
Wednesday, November 25, 2015
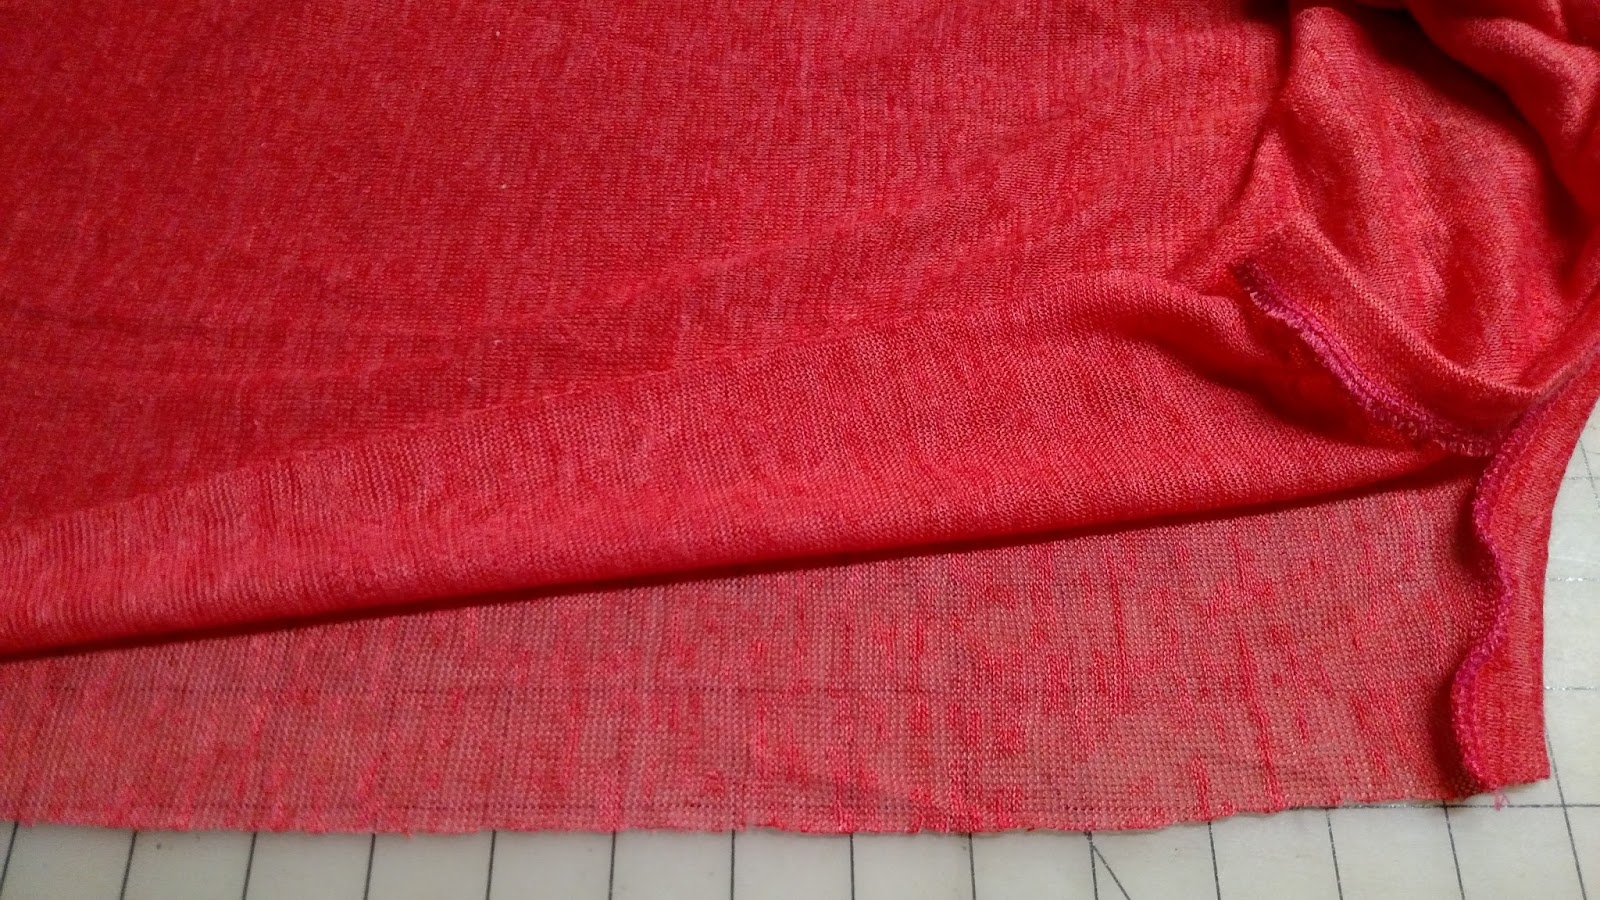
How to Alter a Tight Top and Make it Into a Shrug Jacket
I bought this over-sized, slouchy sweater from a seller I found on eBay because I thought it was super cute and looked comfortable and warm. I even ordered it a size larger than my normal size to make sure it would be loose.

What I got, was a very tight, tissue thin top, that no one could ever truly call a sweater.
So, I wrote in to tell the seller that their sizing is WAY off - I didn't bring up the tissue thin fabric, even though I should have.
The seller responded with a partial refund and an apology.
So, I decided to make the most of the otherwise useless garment by making it into a shrug jacket.
So, I wrote in to tell the seller that their sizing is WAY off - I didn't bring up the tissue thin fabric, even though I should have.
The seller responded with a partial refund and an apology.
So, I decided to make the most of the otherwise useless garment by making it into a shrug jacket.

How to Make a Tight Top Into a Shrug Jacket
- Fold the top in half with the shoulder/neck seams lining up and the side seams lining up. (It will bunch up a bit at the shoulders.)
- Cut along the folded line on the center front of the top. (Sorry about the odd camera angle.)
- Fold the cut edge under 1/2-inch, then fold it under a second time and stitch close to the folded edge to create a simple hem. (I used a zipper foot for this step so I could have abetter view of the fold and keep my stitching as straight as possible.)
- Stitch the length of the center line, and back tack to secure stitching, then trim off the loose thread ends.


(I'll try to remember to pop back in with a picture of how it looks when worn. Feel free to leave a reminder note if I don't.)
Thanks for checking out my tutorial on making a shrug jacket from a tight top. I would love to hear about your upcycling projects if you have time to leave a comment or share a photo.
Tuesday, November 24, 2015
Sewing Christmas Gifts: How to Sew Sheer Butterfly Scarves
Like many others, I've decided to sew some of my Christmas gifts this year.
 |
| Sheer Butterfly Scarf Still need to be ironed... |
So, when I was browsing at the fabric store and saw this incredible sparkly, sheer butterfly fabric, I thought of my mother's love for butterflies, and my own love for delicate shades of pink.
(She doesn't follow my website or I wouldn't mention this yet.)
(<-- <-- <-- <-- <--<-- <-- <--You can see how sheer this fabric is, and the delicate butterfly, but I'm afraid its sparkliness doesn't really show - but it's there.)
First I thought, no... not for winter, but then I thought... not every scarf is for warmth - some can be just for prettiness.
After all, who doesn't need something pretty now and then?
Getting the Sheer Fabric Cut
I told her I wanted one-yard.
She asked what I was making.
I said a scarf.
She asked what kind of scarf.
I told her, just a normal scarf that hangs down.
She must have assumed I have never sewn, or maybe that I would have no other use for the extra fabric, because she went into a very long, detailed explanation of how to make a scarf, and that because the fabric was 60-inches wide, I would need no more than 1/3-yard for a scarf.
Then she asked again how much I wanted.
I told her I wanted one-yard.
I wasn't being a smart-alec, or ignoring her - I just had other ideas for the excess fabric.
After giving me a very disgusted look, and letting out a frustrated sigh to let me know I had offended her, she grudgingly cut the yard of fabric.
How to Make Sheer Butterfly Scarves
 |
| Finished Sheer Scarf |
So, here are the steps I followed, and they worked so beautifully, I wanted to share.
- Cut the strip of fabric, 12-inches wide and 60-inches long.
- (One yard will make three scarves as long as the fabric is 58 or 60-inches long.)
- Fold in one corner about 1/4-inch, on the diagonal, then fold it over again.
- (You could use silk pins, but I just held it with my fingertips to avoid the risk of damaging the sheer fabric.)
- Fold one edge over 1/4-inch, then fold it again, so it folds over the corner fold, kind of anchoring it.
- (Again, you could use silk pins to secure this double-fold, but I just held it with my fingertips and it worked fine.)
- Test your machine's settings on a tiny scrap of sheer fabric to make sure the tension is set right for sewing delicate fabric.
- (As a rule, delicate fabric requires heavy presser foot tension to keep it from sliding.)
- Sew very close to the inner fold-line, hemming as close as you can get without missing the folded edge.
- (The folded edge will almost resemble a small, sheer tube, but it will flatten as you sew.)
- When you get a few inches from the next corner, stop sewing, with the needle down so the scarf stays put, and repeat the corner double-fold, and create the double fold for the next side of the scarf.
- Sew all the way to the edge of the fabric, then back tack two or three stitches.
- With the needle down. turn the scarf 1/4 turn, and back tack the next side's corner, then keep folding and sewing.
- Repeat the corner folding and side hem folding until you have stitched all the way around the scarf.
- Clip off stray thread-ends, then iron the hemmed edges.
- (If you forgot to check the fabric's care label on the bolt when you bought the fabric, err on the side of caution - always.)
- Set the iron on the cool-to-lukewarm setting and use a damp pressing cloth to protect the delicate sheer fabric.
- Or, test the warm iron on a scrap of the fabric, if you have any, to make sure it doesn't melt the fabric.
Final Sheer Fabric Sewing Tip:
Tuesday, June 30, 2015
How to Replace a Jacket Zipper the Traditional Way
I almost called this article "How to Change a Jacket Zipper the Right Way" - but, in spite of my website's name, I don't really believe there is a right or wrong way in sewing.
There are so many ways to sew things and get great end results... Anyway - this is the technique my Home Ec teacher would have approved of for replacing a jacket zipper.
There are not a lot of steps, but it does involve a fair amount of time to complete this.

Trim off thread ends and test the zipper one more time to make sure it works properly, then give yourself a big pat on the back, because you just replaced a jacket or coat zipper the traditional way.
Replace a Coat or Jacket Zipper
There are so many ways to sew things and get great end results... Anyway - this is the technique my Home Ec teacher would have approved of for replacing a jacket zipper.
There are not a lot of steps, but it does involve a fair amount of time to complete this.
Remove the Old Zipper
- Get comfortable, the first step is going to take some time.
- (With two people working non-stop, except for when I stopped to snap this photo, this took two pairs of hands a full hour, so if you're working alone, expect it to take at least two hours.)
- Make sure you have good lighting and get out your seam ripper.
- Pick an end of the zipper, and also pick a side, and begin cutting every other thread that holds the zipper.
- The jacket in my images had a zipper held in by four rows of stitching, which is fairly common for a lined jacket or coat. (Those are my helper's hands, I got to be behind the camera for a few minutes.)
- Keep removing the stitches until the zipper is loose and you can see inside the lining of the jacket (as shown in the image.)
- Pick off ALL the loose thread ends - there will be a lot and they will probably be hard to get hold of to pull out of the zipper placket's fabric.
- If you can't get a grip on the thread ends, you can use tweezers to grab them and them out of the material.
 |
| Cutting a single thread with seam ripper |
How to Install the New Coat or Jacket Zipper
- Position the new zipper in the open-out zipper placket.
- If you prefer to use pins, pin the zipper in place.
- Be aware that some types of fabric will show permanent pin holes if you use pins, so check before you stick pins in your coat.
- If you prefer to just jump in and start sewing, set your sewing machine to its longest stitch with thread in a color that contrasts the garment's fabric so it will be easy to see, and slowly baste the zipper into the placket.
 |
| Sewing Machine Basting |
 |
| Close-Up of Contrasting Basting Thread |
- Finish basting the zipper in place, then test the jacket's zipper to make sure it works properly and lines up correctly.
- If anything is a touch "off" - like the zipper not working smoothly or if it looks crooked - pull out the basting and set the zipper again.
- It can be a little bit of a hassle, but it is MUCH easier to remove basting stitches than regular stitches.
- If everything is good, pull out about three inches of basting stitches, set the machine up with the proper thread and set it to a normal stitch length, then sew about an inch, trying to hit the original stitching line closest to the zipper teeth, from the original zipper.
- Remove about three more inches of basting stitches, then sew about three inches.
- It's a little harder to remove the basting stitches with the jacket placed in the machine like this, but it is the fastest way to do this.
- Keep going three inches at a time until you have stitched the length of the zipper in place.
- Stitch the second row of top-stitching along the zipper, about 1/4-inch in, or on top of the original stitching line - if you can see the original stitch line.
- Repeat these steps on the other side of the zipper.
 |
| Remove Basting Thread |
Trim off thread ends and test the zipper one more time to make sure it works properly, then give yourself a big pat on the back, because you just replaced a jacket or coat zipper the traditional way.
 |
| Completed Jacket Zipper Replacement |
Are You Considering Starting a Sewing or Alteration Business?
Tips on Pricing Jacket Zipper Replacement
I mentioned the time involved a couple times in this article for a reason - if you enjoy sewing and are considering taking in alterations for a business, you are going to need to know how long things take so you can set your prices.
For example, if you are going to give someone a price on changing a jacket zipper, expect a minimum of $5 for the zipper cost (usually more) plus 2.5 hours at however much you want to make per hour - let's say $10 per hour or $25 labor, which is cheap for a skilled task like this - (remember, it's okay to charge what you are worth - if everyone could do this, they wouldn't bring their stuff to you - match your pricing to your skill level - if your skill level warrants more than $10 per hour, charge more) so anyway - when you add the zipper cost to the labor $5 + $25 = $30 - that's $30 you need to charge for this job if you want to make any money.
That might sounds like a lot of money for a jacket zipper replacement, since there are places you can buy a new coat for less than that, but it is ultimately up to the customer to decide if his or her jacket is worth the investment.
Tuesday, June 16, 2015
The Fastest, Easiest Way to Replace a Jacket Zipper Tutorial
If you hate replacing zippers, check out this "cheater" way to replace a zipper in a coat or jacket.
Fast and Easy Way to Fix a Zipper
From start to finish, this took me exactly 40 minutes - and that was with stopping every few minutes to take photos, and cropping the photos and uploading them to my email so I could write this tutorial when I came back to the computer.
I could have done it in about 20 minutes if I hadn't been planning to write about this zipper changing process.
Cut Off the Old Zipper
Since this tutorial is about changing a zipper the fastest way possible, let's stick with the fast theme and jump right into the steps!

- Grab your scissors and cut off the old zipper as close to the seam as you possibly can.
- Cut slowly and carefully so you don't cut the jacket.
- Cut both zipper pieces all the way off.
- Pick off any frayed pieces you can see from the old zipper's ribbon.
Center the Zipper

- Pick up the new zipper and center it on one side, right where the old zipper rested.
- If you use pins, pin the zipper down.
- If you prefer to sew without pins, make a couple small tailor's chalk marks on the end corners and a few along the edge of the zipper's ribbon to make it easy to check your work as you sew - as long as you can see your marks and the zipper is lined up, you'll know you're on track.
- The new zipper will often be either longer or shorter than the
newold one, that's why you center the new zipper to get the best result. - If the new zipper is a touch too long, you can fold the top end under before you begin sewing and then when you stitch it down it will be hidden.
Stitch the Zipper to the Jacket

- Put the zipper foot on your sewing machine and make sure it is set to make a straight stitch.
- Sew the first line of stitching with the zipper foot's edge against the zipper teeth, then sew a second line of stitching with the needle close to the edge of the zipper's ribbon or tape.
- If you are working on a thick coat, it can be challenging to sew straight (as you can probably see in my picture...) and the best remedy for that (TIP) is to sew slowly while keeping a firm hand on the jacket.
Snap and Turn

- If the jacket also has snaps or buttons, fasten them then turn the coat inside out.
- The side of the zipper you haven't sewn yet should be perfectly lined up where you need to stitch it - in this photo you can see due to the contrasting color of the zipper I'm installing.
- Either pin the unstitched zipper edge in place or mark the corners and raw edge with tailor's chalk.
- Unzip the zipper.
- Sew the second side in place the same way you did the first side, sewing against the zipper teeth first and then close to the zipper's edge.
- Clip off your thread ends and turn the coat right side out.
You Just Replaced a Jacket Zipper the Fastest and Easiest Way Possible

If your zipper matches the coat, it will not stand out like this contrasting colored zipper does - though when the snap placket is closed, you cannot see the zipper in this coat at all.
If you try this super easy zipper changing technique, I would love to hear your thoughts on the process.
I hope you like this simple way to replace a zipper as much as I did.
(Seriously, I hate doing alterations, I totally prefer making a whole new garment to things like replacing zippers, but I really didn't mind this at all.)
Tuesday, April 7, 2015
Simplicity Sewing Patterns Done The Easy Way
Simplicity Sewing Patterns Done The Easy Way
By Jessica A
Having been trusted for generations, simplicity sewing patterns are still extremely popular and come in a variety of beautiful designs. If you love using these patterns for your favorite projects, but could use a few tips, this is the perfect article for you to read. Here are some of the top tips for using simplicity sewing patterns.
Measurement Tips:
 If you are creating an outfit for yourself or a family member, you will want the measurements to be right so the clothes can be a perfect fit. There are a few things you can do to make this easier. As for measuring your height, you may want to get someone to help you with this. You want to take off your shoes. This may not seem like such a big deal, but if we want exact measurements the height of your shoes will skew the results.
Using a long tape of some sort, have a friend hold it while you stand against the wall. Get your exact height starting from the bottom of your foot going all the way to the top of your head. Also, when your measuring hips and bust for Simplicity sewing patterns, you want to measure at the fullest point. That way your outfit wont be too tight in those areas.
A Few More Tips To Consider:
After sewing for years, you starting picking up a few tricks and tips here and there that really make a difference. Here are a few of those that might come in handy for your Simplicity sewing patterns.
Want to save money on all of your sewing supplies? Visit Discount Sewing for discounts on Simplicity Sewing Patterns, Brother Sewing Machines and more.
Article Source: Simplicity Sewing Patterns Done The Easy Way
By Jessica A
Having been trusted for generations, simplicity sewing patterns are still extremely popular and come in a variety of beautiful designs. If you love using these patterns for your favorite projects, but could use a few tips, this is the perfect article for you to read. Here are some of the top tips for using simplicity sewing patterns.
Measurement Tips:
 |
| Click here to buy this Brother Sewing Machine! |
Using a long tape of some sort, have a friend hold it while you stand against the wall. Get your exact height starting from the bottom of your foot going all the way to the top of your head. Also, when your measuring hips and bust for Simplicity sewing patterns, you want to measure at the fullest point. That way your outfit wont be too tight in those areas.
A Few More Tips To Consider:
After sewing for years, you starting picking up a few tricks and tips here and there that really make a difference. Here are a few of those that might come in handy for your Simplicity sewing patterns.
- When you're sewing on a button, you can use a piece of clear scotch tape to hold it in place on the garment. When sewing, just sew right through the tape. When you're finished, all you have to do is peel the tape off and discard it!
- When you're working on Simplicity sewing patterns for large projects, such as drapes or dresses with lots of material, you can use golf weights to hold the bottom of the project down while you're working with the top portion.
Want to save money on all of your sewing supplies? Visit Discount Sewing for discounts on Simplicity Sewing Patterns, Brother Sewing Machines and more.
Article Source: Simplicity Sewing Patterns Done The Easy Way
Tuesday, March 10, 2015
What Is it Like to Be a Seamstress?
There are two main types of seamstresses - custom seamstresses - which include dressmakers and tailors - and sewing machine operators.
(Sorry for using the feminine version of the word if you're a dude reading this.)
 A sewing machine operator has the less creative type of sewing work and earns an average wage of $10.33 per hour, though it takes skill and the ability to operate an industrial sewing machine at a high rate of speed. In this position, the sewing machine operator typically does one sewing function of making a garment or textile item.
Dressmaking and tailoring, on the other hand, require measuring, fitting, cutting, sewing and altering garments or creative textile art pieces.
Dressmakers and tailors are typically consulted for design and fitting suggestions at each step of the garment creation process.

A dressmaker or tailor, on the other hand, will, at least at first, need to consult a sewing machine needle chart to ensure using the right type of needle on the fabric being sewn.
I tried to write this without adding too much of my personal opinion, but you didn't click on this to get a dry rendition of what a seamstress does, right?
You are reading this to see what it's really like.
First, if you like sewing, it's a great job - but if hate sewing, you are not going to like it no matter what.
I have worked on production lines as a sewing machine operator, and I really liked it. I like the fast pace and being able to let my imagination run while my hands do the same thing over and over. It's kind of mindless, but I find that freeing because my mins can still work on what ever it wants.
I have also worked on the custom sewing end - and I love that, too. The challenge of measuring and designing and fitting are mentally stimulating - and seeing the finished items can be very rewarding emotionally.
The two types of sewing are almost polar opposites - with the common thread (no pun intended) being the use of textiles and the sewing tools used.
In my opinion, both are enjoyable and worthwhile, even though I have had jobs that paid more, few have been as rewarding overall, or provided as good a quality of life.
(Sorry for using the feminine version of the word if you're a dude reading this.)
Seamstress
 |
| Click here to buy this book! |
Dressmakers and tailors get to enjoy more creativity in their work, as well as a slightly higher average wage of $12.30 per hour.
Sewing Techniques
Most sewing techniques for sewing machine operators are learned on the job, and generally revolve around quickly placing the fabric in the sewing machine and pressing the pedal while manipulating the fabric.Dressmaking and tailoring, on the other hand, require measuring, fitting, cutting, sewing and altering garments or creative textile art pieces.
Sewing Ideas
In a similar vein, sewing machine operators generally work in factories where they are not asked to develop creativity or come up with ideas.Dressmakers and tailors are typically consulted for design and fitting suggestions at each step of the garment creation process.
Textiles
Both types of seamstress will focus on working with textiles. There are, however, many different types of textiles that range from very light knits, woven materials, natural fiber fabrics, and synthetics, to heavy versions of each of those types of sewing fabric. |
| Click here to buy this book! |
Sewing Machine Needle Chart
Sewing machine operators are generally provided with a single gauge needle to do the single function requested.A dressmaker or tailor, on the other hand, will, at least at first, need to consult a sewing machine needle chart to ensure using the right type of needle on the fabric being sewn.
My Thoughts on Being a Seamstress
I tried to write this without adding too much of my personal opinion, but you didn't click on this to get a dry rendition of what a seamstress does, right?
You are reading this to see what it's really like.
First, if you like sewing, it's a great job - but if hate sewing, you are not going to like it no matter what.
I have worked on production lines as a sewing machine operator, and I really liked it. I like the fast pace and being able to let my imagination run while my hands do the same thing over and over. It's kind of mindless, but I find that freeing because my mins can still work on what ever it wants.
I have also worked on the custom sewing end - and I love that, too. The challenge of measuring and designing and fitting are mentally stimulating - and seeing the finished items can be very rewarding emotionally.
The two types of sewing are almost polar opposites - with the common thread (no pun intended) being the use of textiles and the sewing tools used.
In my opinion, both are enjoyable and worthwhile, even though I have had jobs that paid more, few have been as rewarding overall, or provided as good a quality of life.
Saturday, March 7, 2015
Pick Your Size in Simplicity Patterns
It is so frustrating to buy a pattern and put all the effort into making something just to find out it doesn't fit due to discrepancies between the pattern company's sizing and that of mass merchandiser's sizing.
That's why I decided to share this easy to follow video about choosing the right size Simplicity pattern. Make sure to watch it before you go shopping for a pattern for your next sewing project.
Pick Your Size in Simplicity Patterns
Friday, March 6, 2015
Read A Sewing Pattern With Confidence
Read A Sewing Pattern With Confidence
By Monica M Hall
 The key to reading a sewing pattern is one section at a time. Each area of the pattern envelope, (the front, the back and the top flap) all these areas have information to help in selecting your sewing pattern. If you understand what the information in each section means, the more successful you will be in choosing your pattern and the ultimate success of your finished project. The big pattern companies will reflect the basic information provided here.
The front of the pattern:
Skill Level: When you decide what type of project you would like to sew, look at the difficulty factor on the front of the envelope. This will help you decide if you are at the skill level to complete your sewing project. Skill levels will range from very easy to advanced.
Size: The front of the envelope will have the size, if the pattern is for clothing. Craft patterns or patterns for home decor will almost always be one size only. Be very careful to choose the correct size. Patterns are not returnable.
Note: The size chart will be on the back of the pattern. In most cases it will be on the flap at the top of the pattern.
Pattern Number: If you are purchasing your pattern from a fabric store, you will look at the pattern number, write it down and go to the pattern drawer for that brand of pattern. You will find your pattern by the number coded system.
Pattern View: The front of the pattern will have a photo image or illustrated image of what the finished project looks like. In most cases, the pattern will come with variations of the finished project, such as sleeves or no sleeves etc. Each image will be called a view A, view B, view C etc.
The back of the pattern:
Some of the information on the back of the pattern will be repeats of the front of the pattern.
Size Chart: The size chart can be found on the flap at the top of the pattern. Choose your size by your measurements on the chart. Don't panic if you notice a difference in sizes compared to your retail ready to wear garments. Sewing pattern sizes differ from ready to wear. I wear a size 2 in ready to wear, but I am a size 12 in sewing pattern sizes. You will see bust, waist, and hip measurements. If your hip size for example is in the next size category larger than for the bust or waist, choose the larger size. You can always alter the pattern for larger size patterns easier than to adjust from a smaller pattern size.
Description of the garment: In this section there will be a description of each view of the project. An example description would be "close fitted tunic". View A B C have a scoop neck. View B has short sleeves.
Notions: The notions section is where you will see the supplies you will need in addition to the fabric. For example, if you need a zipper or buttons, bias tape, elastic etc.
Note: Each view may have their own unique notions necessary to make the project. This information will be noted for each view.
Fabrics: Here you will see what type of fabric is needed or best suited for the project you have chosen. Some sewing patterns are strictly made for stretch knits and this will be indicated on the front of the envelope. Each view may have a different or the same fabric and this will be indicated. For example, if the pattern includes a top and pants, the fabric for the top could be a jersey knit but the pants could be a light weight wool.
How much fabric is needed: Here you will see a chart that indicates the amount of fabric to buy. This depends on the size of your pattern and the view you choose, as well as, the width of the fabric you choose. On average, fabric bolts come in 45 inch or 115cm or 60 inch or 150cm widths. This section of the pattern will tell you how much you will need based on this criteria. The pattern will also indicate to buy a little more fabric if it has a nap, one way design, stripes or plaid design.
The outline view: At the bottom of the back of the pattern, you will see a detailed outline of the front and back of each view. This will give you a good idea of what the shape of the garment or project looks like.
The inside of the pattern envelope: Here you will find all the pattern pieces you need for each view offered in the pattern. As well you will find a detailed instruction sheet/s of how to cut out and construct your project.
The line drawings of each view and each pattern piece, detailing each pattern piece by number.
Fabric cutting and layout: This will show you all the information about how the each view is laid out on the fabric and sewing information.
Note: Read carefully before starting to layout and cut.
Glossary: This will give you a description of the sewing terms used in the step by step instructions.
The step by step instructions: Each view may have their own special section of instructions. The pattern will indicate which set of instructions pertain to each view.
Now you should be a little more confident in reading and choosing a sewing pattern.
Happy sewing.
Monica Hall is passionate about sewing and is the owner of a sewing website. If you would like to know more about the topics in this article, go to her website at http://sew-stitch-learn.com/sewingpatterns.html and http://www.sew-stitch-learn.com/sewingfabric.html
Article Source: Read A Sewing Pattern With Confidence
By Monica M Hall
 |
| Click here to buy this book! |
The front of the pattern:
Skill Level: When you decide what type of project you would like to sew, look at the difficulty factor on the front of the envelope. This will help you decide if you are at the skill level to complete your sewing project. Skill levels will range from very easy to advanced.
Size: The front of the envelope will have the size, if the pattern is for clothing. Craft patterns or patterns for home decor will almost always be one size only. Be very careful to choose the correct size. Patterns are not returnable.
Note: The size chart will be on the back of the pattern. In most cases it will be on the flap at the top of the pattern.
Pattern Number: If you are purchasing your pattern from a fabric store, you will look at the pattern number, write it down and go to the pattern drawer for that brand of pattern. You will find your pattern by the number coded system.
Pattern View: The front of the pattern will have a photo image or illustrated image of what the finished project looks like. In most cases, the pattern will come with variations of the finished project, such as sleeves or no sleeves etc. Each image will be called a view A, view B, view C etc.
The back of the pattern:
Some of the information on the back of the pattern will be repeats of the front of the pattern.
Size Chart: The size chart can be found on the flap at the top of the pattern. Choose your size by your measurements on the chart. Don't panic if you notice a difference in sizes compared to your retail ready to wear garments. Sewing pattern sizes differ from ready to wear. I wear a size 2 in ready to wear, but I am a size 12 in sewing pattern sizes. You will see bust, waist, and hip measurements. If your hip size for example is in the next size category larger than for the bust or waist, choose the larger size. You can always alter the pattern for larger size patterns easier than to adjust from a smaller pattern size.
Description of the garment: In this section there will be a description of each view of the project. An example description would be "close fitted tunic". View A B C have a scoop neck. View B has short sleeves.
Notions: The notions section is where you will see the supplies you will need in addition to the fabric. For example, if you need a zipper or buttons, bias tape, elastic etc.
Note: Each view may have their own unique notions necessary to make the project. This information will be noted for each view.
Fabrics: Here you will see what type of fabric is needed or best suited for the project you have chosen. Some sewing patterns are strictly made for stretch knits and this will be indicated on the front of the envelope. Each view may have a different or the same fabric and this will be indicated. For example, if the pattern includes a top and pants, the fabric for the top could be a jersey knit but the pants could be a light weight wool.
How much fabric is needed: Here you will see a chart that indicates the amount of fabric to buy. This depends on the size of your pattern and the view you choose, as well as, the width of the fabric you choose. On average, fabric bolts come in 45 inch or 115cm or 60 inch or 150cm widths. This section of the pattern will tell you how much you will need based on this criteria. The pattern will also indicate to buy a little more fabric if it has a nap, one way design, stripes or plaid design.
The outline view: At the bottom of the back of the pattern, you will see a detailed outline of the front and back of each view. This will give you a good idea of what the shape of the garment or project looks like.
The inside of the pattern envelope: Here you will find all the pattern pieces you need for each view offered in the pattern. As well you will find a detailed instruction sheet/s of how to cut out and construct your project.
The line drawings of each view and each pattern piece, detailing each pattern piece by number.
Fabric cutting and layout: This will show you all the information about how the each view is laid out on the fabric and sewing information.
Note: Read carefully before starting to layout and cut.
Glossary: This will give you a description of the sewing terms used in the step by step instructions.
The step by step instructions: Each view may have their own special section of instructions. The pattern will indicate which set of instructions pertain to each view.
Now you should be a little more confident in reading and choosing a sewing pattern.
Happy sewing.
Monica Hall is passionate about sewing and is the owner of a sewing website. If you would like to know more about the topics in this article, go to her website at http://sew-stitch-learn.com/sewingpatterns.html and http://www.sew-stitch-learn.com/sewingfabric.html
Article Source: Read A Sewing Pattern With Confidence
Read A Sewing Pattern With Confidence
Thursday, February 26, 2015
Medium to Advanced Skill Sewing Gift Ideas
You've given it a lot of thought - you want to give someone a gift that shows how much you care - something that you can put your heart, soul, and creativity into... but what should you make? These gift ideas are things medium to advanced skill sewing enthusiasts can take on to create a great, thoughtful gift.

 Whether you like to pick up patterns or just make your own freehand fashion designs, these are some fun and slightly challenging sewing project ideas you can try making.
Sewing Gift Ideas
- Make purses: You can tear apart an old purse to use as a pattern or pick up a purse pattern at the fabric store or from an online seller.
- Shopping tote bags with zippers and pockets: Tote bags can be as easy or as challenging to make as you want them to be. A basic tote bag is very simple, but when you add things like pockets and other details, making them requires more skill.
- Garments of most any kind with extra details: when learning how to sew clothes, stick to basic, classic styles, and move into more challenging designs when you feel ready.
- Car seat covers: You probably won't find much in the way of patterns for car seat covers, so you'll have to make your own if this sewing gift idea appeals to you. Just make sure your covers have open spots for seat belts when you're done.
- Fitted furniture covers: Fitted furniture covers take a lot of fabric, especially if you're thinking - couch - but patterns are available for many cover styles to help you with specifics.
- Household crafts and decor pieces: Sewing craft ideas are easy to find with a quick visit to a site like Pinterest or a relaxed browse through a pattern book at your favorite fabric store.
Thursday, February 12, 2015
Unique Places to Buy Sewing Patterns
 |
| Image courtesy of MorgueFile |
Unique Places to Shop for Sewing Patterns
You can save money on your sewing patterns by waiting for sales or checking out some unusual places to buy patterns.Simplicity Patterns on Auction Sites
Simplicity, and other brands of patterns, can be purchased from auction sites, such as eBay. Look for sellers with good ratings, and discounts on shipping - or free shipping - to get the best deal possible. It's also a good idea to look for uncut patterns.A second advantage of buying patterns on auction sites is that you have a wider selection and can even find beautiful out-of-print patterns.
McCall's Patterns in Thrift Shops
McCall's, and other brands of patterns, can be purchased from thrift stores, in some cases for as low as a dime. Look for uncut patterns, unless you know how to draft missing pieces or are willing to pull the pattern out and make sure everything is there.Vogue Patterns on Private Websites
Many private website owners will list unneeded Vogue and other specialty patterns for sale. I even have a few listed here on Stitching it Right, plus many more I would like to list so someone could enjoy using them.Butterick Patterns on Deep Discount
While it's a pretty common place to buy patterns, sometimes sewing and craft stores list patterns at deeply discounted prices, such as the occasional 10 patterns for $10 sale at JoAnn's. With regular price on patterns resting at about $15 (often more) these $1 patterns give you a great way to save money on making the latest fashions.
Saturday, February 7, 2015
Monday, January 5, 2015
Subscribe to:
Posts (Atom)