Monday, July 30, 2018

How to Do the Stem Stitch by Hand in Flower Embroidery

The stem stitch is a  variation of the back stitch, and it's used a lot in flower embroidery as well as many other types of hand embroidery designs.

The stem stitch is a fairly easy stitch to master, and it adds a beautiful effect to your embroidery designs.

Stem Stitch in Flower Embroidery image courtesy of Pixabay


Information About the Hand Embroidery Stem Stitch 


The stem stitch and back stitch are so similar they can almost (but not quite) be used interchangeably in some flower embroidery designs.

While the back stitch forms a line of stitches that look like machine stitching on the surface, the stem stitch adds a touch of width and boldness to the effect.

It's thicker lines enhance the appearance of stems and leaves on flowers, and you can also use it for things like lettering in monograms or borders any time you want to frame something so it really stands out.

To make the stem stitch:

  • Bring the needle up through the fabric from the back at the desired starting point. 
  • Bring it about 1/8-inch forward then poke it back down through the fabric.
  • In the center of the stitch, just to one side, bring the needle back up through the fabric. 
  • Move the needle 1/8-inch forward and poke it back through the fabric. 
  • Repeat this over and over until you reach the end of the line to make your desired shape.
  • Anchor the stitches on the back side of the fabric by making two or three tiny stitches.
The video tutorial below shows how to do the stem stitch if you would like to also watch how to do it.

Video Tutorial Showing How to Make the Stem Stitch in Embroidery Designs


Hand embroidery can be a really enjoyable way to pass the time and make some unique creations.

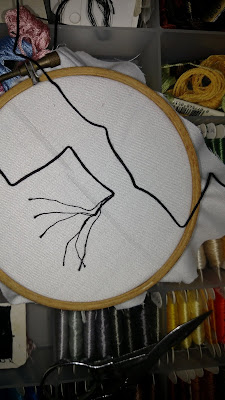
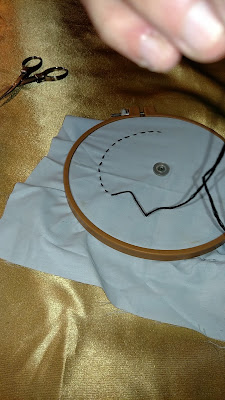
It does take patience and practice, though, and sometimes it takes a while for designs to take shape - as you can see in the video, where the freehand flower embroidery design I'm creating in this quilt square is only just beginning to take shape after several episodes of Sewing Lessons from Stitching it Right.


Questions and comments are always welcome here, in our new Facebook group or our long-time Facebook page, or on the Stitching it Right video channel

Friday, July 27, 2018

How to Make the Blanket Stitch

The blanket stitch is mainly a decorative stitch used to finish fabric edges, but there are some other things you can do with it, such as adapting it to finish hand sewn buttonholes, or even binding carpet if you don't have a sewing machine that can bind the edges.

Making the Blanket Stitch
Making the Blanket Stitch image courtesy of Pixabay


About the Blanket Stitch


If you're binding fabric that doesn't fray, like polar fleece or felt, you can use a wide blanket stitch and heavy thread to create a dramatic effect.

If the fabric you're stitching is woven and may unravel around the cut edges, make a shorter, tight blanket stitch or roll the cut edge under about 1/8-inch, as if you were making a rolled hem by hand, and use the blanket stitch to sew the rolled edge.

If I'm doing this stitch on something heavy, like a blanket or carpet edge, I like to use a coarse thread or six strand upholstery thread.

The blanket stitch is also the stich used to hand sew buttonholes, you just make the stitches narrow and tight to keep the cut fabric from stretching out of shape or fraying.

When I use the blanket stitch on lighter fabric, I prefer to use either regular sewing thread or split 3-strand embroidery floss.

Blanket Stitch Video Tutorial


This hand sewing a blanket stitch video tutorial on Hand Sewing from Stitching it Right YouTube channel takes you step-by-step through the process of making a blanket stich to finish the edge of your fabric.

Feel free to leave a comment, join us on Facebook, or subscribe to the Sewing Lessons channel for more tips and tricks about sewing or to ask a question anytime.


How to Thread a Needle With a Needle Threader

Threading the needle is typically one of the earliest steps you do in any sewing or mending project, and using a needle threader makes it quicker and easier.

A needle threader is usually faster and easier than threading needles using the "squint and poke method."

How to Thread a Needle With a Needle Threader
How to Thread a Needle With a Needle Threader image courtesy of Pixabay


Why You Use a Needle Threader


The "squint and poke method" is exactly what it sounds like.

You squint up your eyes to try to focus for a clear view of the needle's eye, then poke the thread end through the hole - sometimes it goes the first time - but if your vision isn't perfect and your hands are perfectly steady, it can take several tries.

I actually do often use the "squint and poke" technique when I'm threading needles.

It's how I learned to thread a needle when I was a kid, but my eyes aren't as clear as they were when I was a kid, and sometimes it takes several tries to get it.

But, today I was rushing through, gathering my supplies to prep to film the video episode of Sewing Lesson From Stitching it Right, and I grabbed my needle threader to save some time.

That's when it occurred to me that I should include a quick video about how to thread a needle using a needle threader.

Video Tutorial Showing How to Use a Needle Threader


So, this post isn't very long, and the video is super short too, but knowing how to use a needle threader is really handy, and it can save you a lot of time and frustration when you need to thread a needle.

Thursday, July 26, 2018

Sewing and Pet Safety

Pets love being close to their people, and when we're sitting down and sewing, they especially like to be close - and that's awesome - but - it increases the need for pet safety when sewing. 

The kitten grabbing your thread or chasing a loose button around on the floor may be super cute, but if your pet accidentally swallows your sewing supplies it can sometimes be fatal. 

This is Squeaky from WoofMeowClic1, 
and she wants to share info about 
pets and sewing safety today!

Sewing Supplies and Pet Safety


This post and the corresponding video were inspired by a post I read on Facebook, about a woman's cat that died after eating sewing thread. I think of sewing as a fairly safe hobby, and as hobbies go, it probably is one of the safest, but that doesn't mean it's 100-percent safe - especially if you're sewing in the same room where your pets play.

Pet safety when sewing starts with awareness and knowing your pet. For example, my dog loves to eat shiny things. I can't leave pins, beads, buttons or anything that catches and reflects the light where he can get it - not even for a moment.

Cats tend to love things they can chase, like thread, yarn, and ribbon - and it's cute as can be - until they eat it... which can lead to choking or even swallowing it completely and ending up with it wrapped in their stomachs - like what happened to the poor cat in the story I read.

As a rule of thumb, if something is small enough for your pet to swallow, take NO chances. If possible, it's best to completely keep pets out of the area where you sew.

This is true of both hand sewing and machine sewing. With hand sewing, there's more dangling to catch a pet's attention. With sewing machine handicrafting, your pet could get its paw or face stuck in the moving parts of the machine. 

Safely Sewing With Pets


If you have any other suggestions for pet safety when sewing, please feel free to share them either in the comments here, on our Facebook page, or on our free Sewing Lessons From Stitching it Right video channel.
Wednesday, July 25, 2018

How to Make the Satin Stitch in Hand Embroidery

In hand embroidery, the satin stitch is used to fill in spaces with color. It's a great way to fill in flower petals or add color to a basket. The satin stitch is an easy hand embroidery stitch, and I also share a way to do a faux satin stitch in the video in case you want to try a satin stitch technique that saves embroidery floss.

Embroidery Floss for Hand Embroidery Satin Stitch image courtesy of Pixabay

Hand Embroidery Satin Stitch Tutorial


To start the satin stitch, prepare your fabric, ideally by stretching it flat in an embroidery hoop.

Also, prepare the needle by threading it with embroidery floss and knotting the end.
  • Poke the tip of the needle through the fabric at your desired starting point, then pull the embroidery floss all the way through.
  • Move the needle tip all the way across the space you're filling, up to an inch or two in width, then poke the needle down through the fabric.
  • Bring the yip up the needle back up through the fabric right beside the first stitch, then back down through the fabric at the other end, making the embroidery thread lines run parallel to one another.
  • Repeat the first steps over and over until you've filled the space you are embellishing with embroidery floss.
The true satin stitch uses quite a bit of embroidery thread, and I've come up with my own faux satin stitch that I use sometimes when I run low on embroidery floss. 

I shared my faux satin stitch technique in the video below after the step-by-step example of the classic satin stitch. 

Video Showing the Satin Stitch in Hand Embroidery


Hand embroidery can be used to add charming touches to home decor, garments, monogramming any textile item, and even the things you make for your pets.


Thanks for visiting Stitching it Right, comments are always welcome, join us on Facebook, or head over to the Sewing Lessons From Stitching it Right YouTube channel to check out our free video sewing tutorials.

Tuesday, July 24, 2018

How to Make the BackStitch in Hand Embroidery

The back stitch in embroidery is used to create a solid line that resembles a line of machine stitching. It's great for making stems, as shown in the video, and it's handy for outlining things and even monogramming garments with hand embroidery.

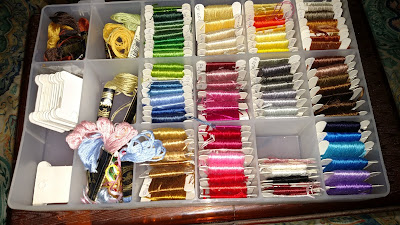
Embroidery Floss Case

How to Hand Embroider the Back Stitch


 The back stitch is the embroidery stitching shown in green in the video below.

It's an easy stitch to master with just a bit of practice, and you can use it for a lot of different designs in embroidery.

You can also use this stitch any time you need to make a strong seam by hand sewing, so it's useful for mending clothing or making things.

In the video, I'm showing how to combine different embroidery stitches to create an entire design, so be sure to subscribe to the Sewing Lessons From Stitching it Right YouTube channel if you want to see how it turns out.

It's also going to be a handy channel to follow if you want to learn how to sew because there's SO much more planned.

Video Showing the Steps to do the Back Stitch in Hand Embroidery Sewing


To hand embroider the back stitch, prepare your fabric and a threaded needle, then:

  • Poke the needle through the fabric and pull the embroidery thread through the fabric at the desired starting point.
  • Move the needle's tip 1/8-inch to 1/4-inch forward then poke it back down through the fabric.
  • Pull the embroidery thread taut, then poke the needle back up through the fabric about in the center of the stitch. 
  • Move the needle's tip forward the same distance, again, then poke it down through the fabric and pull the embroidery thread tight. 
  • Repeat these first steps over and over until you reach the end of the line you are stitching.
  • Anchor the thread on the back side of the fabric with two or three tiny stitches that are hidden behind the embroidery floss on the front of the fabric.
Thanks for reading, and feel free to ask any questions or add comments here, on Facebook, or on the Sewing Lessons From Stitching it Right YouTube channel.

Friday, July 20, 2018

What You Need to Know About Embroidery Floss for Hand Embroidery

I love doing hand embroidery, so I'm really excited about bringing you this series of posts and videos about embroidery. Today's 'lesson' is about embroidery floss. My Grandmother taught me to do this type of handiwork at a young age, and that in itself provides a lot of memories that I'll always treasure.


Six-Strand Embroidery Floss

Every time I pick up an embroidery hoop and create something, I think of the time spent with Grandma, and I remember her voice telling me the tips I'm sharing with you in my videos and articles, and hopefully, someday you'll teach this style of creating to someone you care about. 

You can embroider so many things by hand. It's a great way to embellish clothing, textile things around the house, and even plush toys for young children or pets.

Handiwork Embroidery Floss Basics


Embroidery floss for hand sewing is made up a series of fibers. Each strand is made of six strands, and each of the six strands is woven from two fibers twisted into a fine thread.

You can use all six strands at once if you're trying to create a plush, thickly embroidered design, but there are advantages to splitting it.

  • Most hand embroidery involves delicate stitches that can be overwhelmed by thick floss. You can split it into two or three strands, or even a single strand, but for most delicate designs, three strands are ideal. 
  • With three strands, you get enough plushness to give off a dramatic effect without it looking either sparse or overdone.
  • The split fibers are also easier to pull through the fabric if you're embroidering on tightly woven fabric.
  • Cut the embroidery floss into sections about 12-18 inches long before splitting it. If you try to split a section that's too long, it ends up knotted. Longer sections also end up weakening your floss as it pulls through the fabric over and over.

In the video below, I show a line of stitching made from six-strands and another made from three - so you can get an idea of the difference in appearance.

Tips for Choosing Embroidery Floss for Projects


If you're working on a large project, try to get all the embroidery floss you need at once, and stick to the same brand, at least within each color to avoid ending up with unwanted variations in color or texture.

Make a note of the colors you're using, or keep the little band from the skeins of embroidery floss in case you need more floss - to increase your chance fo getting a perfect match.

If you're trying to create special effects, look at some of the unique types of floss, like metallic, silk, pearlized cotton, or variegated color floss.

Most hand embroidery floss is made of mercerized cotton, which gives it more strength and luster than unmercerized floss would have, and it can also be called stranded embroidery cotton thread, as noted by Sew Guide.

Thanks for reading, and check out my Sewing Lessons From Stitching it Right videos on YouTube or visit the Stitching it Right Facebook page to join the conversation there.

Tuesday, July 17, 2018

How to Do the Straight Stitch in Hand Embroidery

Hand embroidery is one of my first loves when it comes to creative sewing, and I'm so excited to start sharing hand embroidery videos to help other learn this awesome way to make beautiful things. Today's episode teaches the most basic of hand embroidery stitches, the straight stitch.

Straight Stitch in Hand Embroidery
Example of Straight Stitch in Hand Embroidery


Uses for the Hand Embroidery Straight Stitch


In the embroidery tutorial video shared here, I used the straight stitch to create a border for a quilt square.

This stitch is also called the running stitch, and it is the same hand sewing stitch used for hand-basting in garment-making.

You can use this stitch with regular thread instead of embroidery floss to quickly mend ripped seams in garments, too.

The square shown in the video has a button I attached in an earlier episode of Sewing Lesson From Stitching it Right. The button is going to be the center of a flower, and if you like the way this freehand embroidered flower looks when I get to the final episide, how to make it yourself will be shown in videos, and you can follow them through one by one.

Each video is short, so you can do it a step at a time, and you, of course, have the choice to do a step a day or do the entire project in one session if you're excited to get started.

Here's the video, and the written directions are below:


What You Need to Do the Straight Stitch


Embroidery Floss in Storage Case
Embroidery floss: Embroidery floss, like regular thread, should be cut in sections no longer than 18 inches long.
  • This reduces the chance of it tangling while you're working. Embroidery floss is crafted from three strands of fiber twisted together. 
  • When you want a heavy effect, like I did for the border shown in the video, use a fairly large needle and expect it to pull fairly hard as you tug the floss through the fabric. 
  • (You can actually hear it pop a few times in the video because I had to pull so hard.)  
  • For most embroidery, you'll want to split the floss into either two or three strand sections because it still gives off a kind of luxe effect but it's easier to work with and does less damage to the fabric, and I'll put up a quick video to show you how to do that. 

Embroidery needle: You may be able to get by with 'just any hand sewing needle" - there is, however, a difference in embroidery needles tha tmakes them ideally suited to hand embroidery and worth the effort to seek out when shopping for hand embroidery supplies.
  • Embroidery needles are designed with longer, narrower eyes than regular hand sewing needles. 
  • The narrow design makes it easier to pull the needle through tightly woven fabric.
  • The long, narrow eyes in embroidery needles make it easier to feed the embroidery floss through when you're threading them. 

Embroidery hoop: It's possible to work without an embroidery hoop, but using one reduces the soreness and stiffness you expereince in your fingers and hands.
  • When the fabric is properly secured in an embroidery hoop, it's easier to see what you're doing. 
  • It also gives you more control over the fabric and needle so you can make sure you stitches land right where you want them. 

Fabric: Not trying to be facetious here, but you have to have something to embellish or practice sewing on when you're learning to do the straight stitch.
  • If it's your first time trying this stitch, you may want to grab a scrap of fabric or an old garment that's worn out so you can practice as long as you want. 
  • If you're ready to add your straight stitches to a project as an embellishment, make sure the fabric is smooth, ideally in an embroidery hoop, but you can do it by working slowly and carefully even if you don't have one.

Thimble: Thimbles are optional, but can save your fingers some soreness, especially if you're working on a tightly woven fabric and using all six fibers of the embroidery floss.

Steps for Making the Straight Stitch


Prepare the needle: Thread the needle and tie one end of the embroidery floss.
  • Adjust the floss so the loose end is about four inches higher than the knot. 

Start Embroidering: Poke the needle through from the back of the fabric and pull the thread through all the way.
  • Move the tip of the needle between 1/8-inch and 1/4-inch, depending on the effect you're trying to create, and poke it down through the fabric. 
  • Repeat the steps over and over until you reach the end of the area you're embellishing.

Anchor the stitches: With the needle on the back side of the fabric, make two or three tiny stitches that are hidden under the previous stitches, then cut off the thread ends.

Thanks for visiting Stitching it Right, be sure to visit our YouTube Channel, Sewing Lessons From Stitching it Right or hop over to our Facebook page for quick answer to any sewing-related questions you may have.

Sunday, July 15, 2018

How to Quickly Reattach a Button in 10 Steps

Sewing a button on is a useful life skill, and it's one almost everyone can use at some point in life. So, if you need to know how to reattach a button, you're in the right place.

How to Sew On a Button image courtesy of Pixabay

10 Steps to Sew On a Button

It happens to almost everybody at some point, you grab your favorite shirt, put it on, only to find a loose or missing button. If you can sew it on yourself, you can get on with your day with no more than a few minutes invested in this simple sewing repair task.

What You'll Need
  • Needle
  • Thread
  • Button
  • Pin (optional)
  • Embroidery hoop (optional)
  • Fabric to sew the button onto
  • Scissors or snips to cut the thread (optional)
Steps
  1. Thread the needle with a piece of thread about 18 inches long, and knot the ends of the thread together. 
  2. If you have an embroidery hoop handy, it helps to put the fabric in the embroidery hoop to pull it taut, because it's easier to sew that way. You can do it without the hoop, though, if desired and it still works fine. 
  3. Poke the needle down through the face of the fabric in the spot where you want to put the button.
  4. Then, poke the needle back up through the fabric as close as possible to the knot.
  5. Drop the button with the groove side facing up onto the needle. 
  6. Poke the needle through the other hole in the button and start to pull the thread tight, but slip the pin into the thread loop that forms before pulling it all the way tight. (I forgot to show this in the video, but if you're in a hurry, this step is optional anyway.)
  7. Poke the needle back up the first hole, then repeat the steps until you have at least four or five layers of thread running through the holes in the button. 
  8. Bring the needle through between the button and fabric and wrap the thread around the stitching three or four times to form a button shank.
  9. Poke the needle through the fabric so it comes out on the wrong side.
  10. Do two or three anchor stitches, which are just tiny stitches, on the underside of the fabric and then snip off thread ends. (If you don't have scissors handy, it may be possible to bit the thread apart or carefully cut it with a knife.)

Fast Button Sewing Video Tutorial


This step-by-step tutorial on how to sew a button on a garment in under 3 minutes features a video from our new Sewing Lessons From Stitching it Right channel. It shows the entire process so you can see just how quickly this task can be performed, and the text of this article includes a couple pointers I forgot to add in the video.


(I'm sorry for the odd camera angles in the beginning and end of the video when I introduced the video and said goodbye at the end. I was filming by myself and wanted to make sure you could see what my hands were doing - so I didn't want to move the camera once I had it set up and risk messing up the view of the fabric and button.)

If you have any questions, feel free to ask, and if you're interested in learning to sew, please subscribe to the Sewing Lessons From Stitching it Right YouTube channel.

Saturday, July 14, 2018

Intro to a Basic Household Sewing Machine

In today's episode of Sewing Lessons From Stitching it Right, I went over the basic features of my base model Brother XR-65 household sewing machine, because I wanted to take the time to point out some of the sewing machine's features for new sewists who may have never used a sewing machine before.


Tips to Learn to Sew on a Sewing Machine


The first thing a new sewing artist, or sewist for short, should do is learn about the basic features of their sewing machine.

Using the Brother XR-65 shown in the video as an example, it's important to know things like how to change stitches, adjust the stitch length, and where the bobbin goes.


I can't find a link to the exact machine shown in my video via Amazon to share with you here - probably because it's an older model - so I am sharing an Amazon ad for the closest Brother machine I can find, which has apparently replaced this particular model.

(To check out the specifications and features, if you're looking for an entry-level household sewing machine to make clothes or other handicrafts, just click the image in the ad on the left.)

Reasons to Get a Basic Sewing Machine


There are so many types of sewing machines available, it can get overwhelming trying to choose one, and each kind has some advantages.

Some reasons you may want to pick up a basic model, like the one shown, include a tight budget, being new to sewing, or simply needing a backup machine.

I originally bought my Brother XR-65 as a backup machine in a pinch when my industrial machine broke when I was working on a customer's order.

Disadvantages of Buying Basic Sewing Machines


First, with a basic machine, you don't typically get a lot of extra features.

The brother models shown in my video and in the ad actually have a lot of features for the price point they're offered at - but I have found a drawback with my own machine.

While it started out as a great machine that stitches very nicely and has held up through some heavy use, a lot of its internal parts are made of plastic.

Plastic parts simply don't hold up the way metal parts in some higher priced machines do - and when things started to break on it - it was kind of one thing breaking after another.

I will say, for what I paid, it served me well, and with some tweaks, I've been able to keep it stitching.

So, I wouldn't recommend it as a machine to last a lifetime, but, I would heartily recommend it as a machine to get you through until you can afford a better quality machine, or until you've been sewing for a while and are certain you enjoy the hobby and want to spend a bit more on your craft.

Thanks for visiting Stitching it Right, and it would be so great if you subscribe to the Sewing Lessons From Stitching it Right video channel or join and like us on Facebook to continue the conversation about sewing and to pick up more fun tips on how to sew.

Happy Sewing!
Laure

Friday, July 13, 2018

Basic Supplies Needed for Hand Sewing

Hi Everyone!

I just uploaded the second episode of Sewing Lessons From Stitching it Right to YouTube, and it's a basic list of things you need for hand sewing.


Short List of Hand Sewing Supplies


Sewing by hand is relaxing and a great way to quickly mend something, and this episode of Sewing Lessons From Stitching it Right gives you a quick overview of some things you may want to pick up for your own hand sewing projects.

The absolute must-haves are something fabric to sew, a needle, and thread, but there are also some things that can make the task easier. (Like scissors to neatly cut the thread, embroidery hoop to hold the fabric taut while you work, and sewing notions like hooks & eyes, buttons, and snaps.


Tips for Saving Money on Hand Sewing Supplies


I would like to add a few tips for saving money on your sewing supplies. One way is to visit sites like eBay, which I added an ad for just above this, if I did it right. Search by lowest price or look for bulk lots of sewing supplies. Just be sure to compare prices to be sure you're getting the best deal.

I also pick up a lot of vintage sewing supplies at yard sales and thrift shops. Buy your thread new, though, if possible. I recommend avoiding buying thread at those types of places simply because you don't know how old it is, and sewing thread gets weaker with age, and I would hate tsomethingehting just to see it come apart.

Also, Craftsy is currently, as of this posting, having a sale on supplies, tools, and kits, up to 40-percent off - so I'll drop an ad to tha tbelow... Up to 40% Off Cake Decorating Tools & Supplies at Craftsy.com through 7/15/18. No coupon needed.
If you check out the video and like it, be sure to click the little thumbs up icon and subscribe, and leave a comment if you want to because I would love to hear from you.

Thursday, July 12, 2018

Introducing Sewing Lessons From Stitching it Right

I uploaded the first episode of Sewing Lessons from Stitching it Right to YouTube today, and I wanted to invite everyone who visits here to pop over and check it out. It's only 35 seconds long because I was kind of nervous, but I wanted to get this project started to help others learn to sew.


Do You Want to Learn to Sew?


Please, please, subscribe to the channel if you want to learn how to sew because there are so many great tutorials scheduled in our video publishing line-up.

The episodes will cover hand sewing, hand embroidery, household sewing machine sewing, and industrial sewing techniques you can use when making your own projects - we'll also be bringing in some instructors to share info on machine embroidery and (hopefully) quilting.

Also, if you have a particular technique you want to learn about, leave a note in the comments here or on the YouTube channel.

We'll then bump that up in the publishing schedule so you can have the info you want as quickly as possible.

Why Stitching it Right Started a Video Channel


A conversation about how I learned to sew was the inspiration for this channel.

My best friend asked me how I learned to sew, and I told her about receiving a kit when I was three years old that contained a piece of burlap, some yarn, two huge plastic buttons, and a plastic needle - and how I stitched those buttons on that burlap, then removed the stitches and used it over and over again.

I did that, literally, for hours and hours -- until my mother and grandmother started teaching me to sew other types of handcrafts. Then I did a beginner level sewing project using a sewing machine - for 4H - when I was in the fourth grade.

She said she wished her mother or grandmother would have taught her to sew, but they didn't sew themselves... and it started me thinking how many people might benefit from having someone to show them some sewing techniques so they can make their own clothes, bags, home decor, or even car interiors.

A Little More About My Qualifications to Teach Sewing


As an adult, I already had a strong understanding of sewing techniques due to learning how to sew as a child and enjoying sewing as a lifelong hobby... but I wanted to learn how to do custom upholstery work.

So, I took an adult ed course in upholstery, which was great but didn't give me the experience I wanted in regard to customizing classic car interiors.

So I signed up for a distance course in custom interior work that was supposedly created by George Barris, the Batmobile's creator.

I got a lot out of the course and followed it with an apprenticeship with a local car interior shop before branching out and running my own little custom interior shop.

Then, wanting to expand into some creative designer garment-making, I took another distance course, this one in fashion design. (Learning options can be limited when you live in the country.)

It was a great course because it gave me background information on types of fabric and some sewing techniques that were new to me in spite of having years of experience under my belt at that point.

Thanks for reading, and if you check out the video, I would love to hear what you think and what you would like me to cover next.

Laure


Total Pageviews