 |
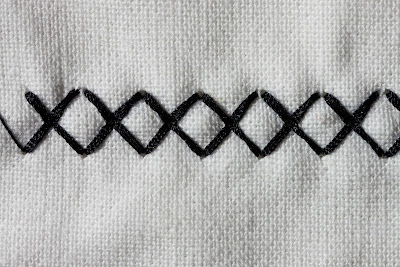
| Hand Embroidery Cross Stitch image courtesy of Pixabay |
How to Hand Embroider the Cross Stitch
One popular way to do the cross stitch, especially if you're new to hand embroidery, is by getting an iron-on embroidery pattern to follow.
An iron-on embroidery pattern can actually be a big help when you're first learning this hand sewing technique, because, as you'll see in the video below, it can be challenging to keep your stitches straight when you're doing freehand embroidery.
Steps for Cross Stitching in Embroidery
- Bring the needle up through the fabric from the back side - at the desired starting point.
- Bring the needle's tip to the next point, on the diagonal, and then push it down through the fabric.
- Pull the embroidery floss until it's snug.
- Bring the needle's tip over to the spot beside the first spot where you brought it up through the fabric. (That sounds a bit confusing, so if I lost you there, definitely check out the video to see it.)
- Repeat the stitching until you've formed all the cross stitches you need to add in that color of embroidery floss.
- Anchor the stitching with a couple of tiny stitches on the back side of the fabric - positioned so it's under another stitch so it doesn't show.
Video of Making the Cross Stitch in Hand Embroidery
With this video of the cross stitch, I'm just about through the basic hand embroidery stitches, and I'll be moving into turning the different stitches into a complete design.
If you enjoy the videos, it would be so great if you would subscribe to my YouTube channel. Plus, comments are always welcome here on the website and the Stitching it Right Sewing Talk Facebook group or page are also open for questions, sharing your creations, and just talking about sewing so feel free to join us there anytime.

No comments:
Post a Comment